CLOUD Setting up custom fields
Step-by-Step Guide
Add custom fields
Creation of custom fields for the SAP Transport Panel functionality.
Further information → Custom fields types in company-managed projects
| Step | Procedure | Example |
|---|---|---|
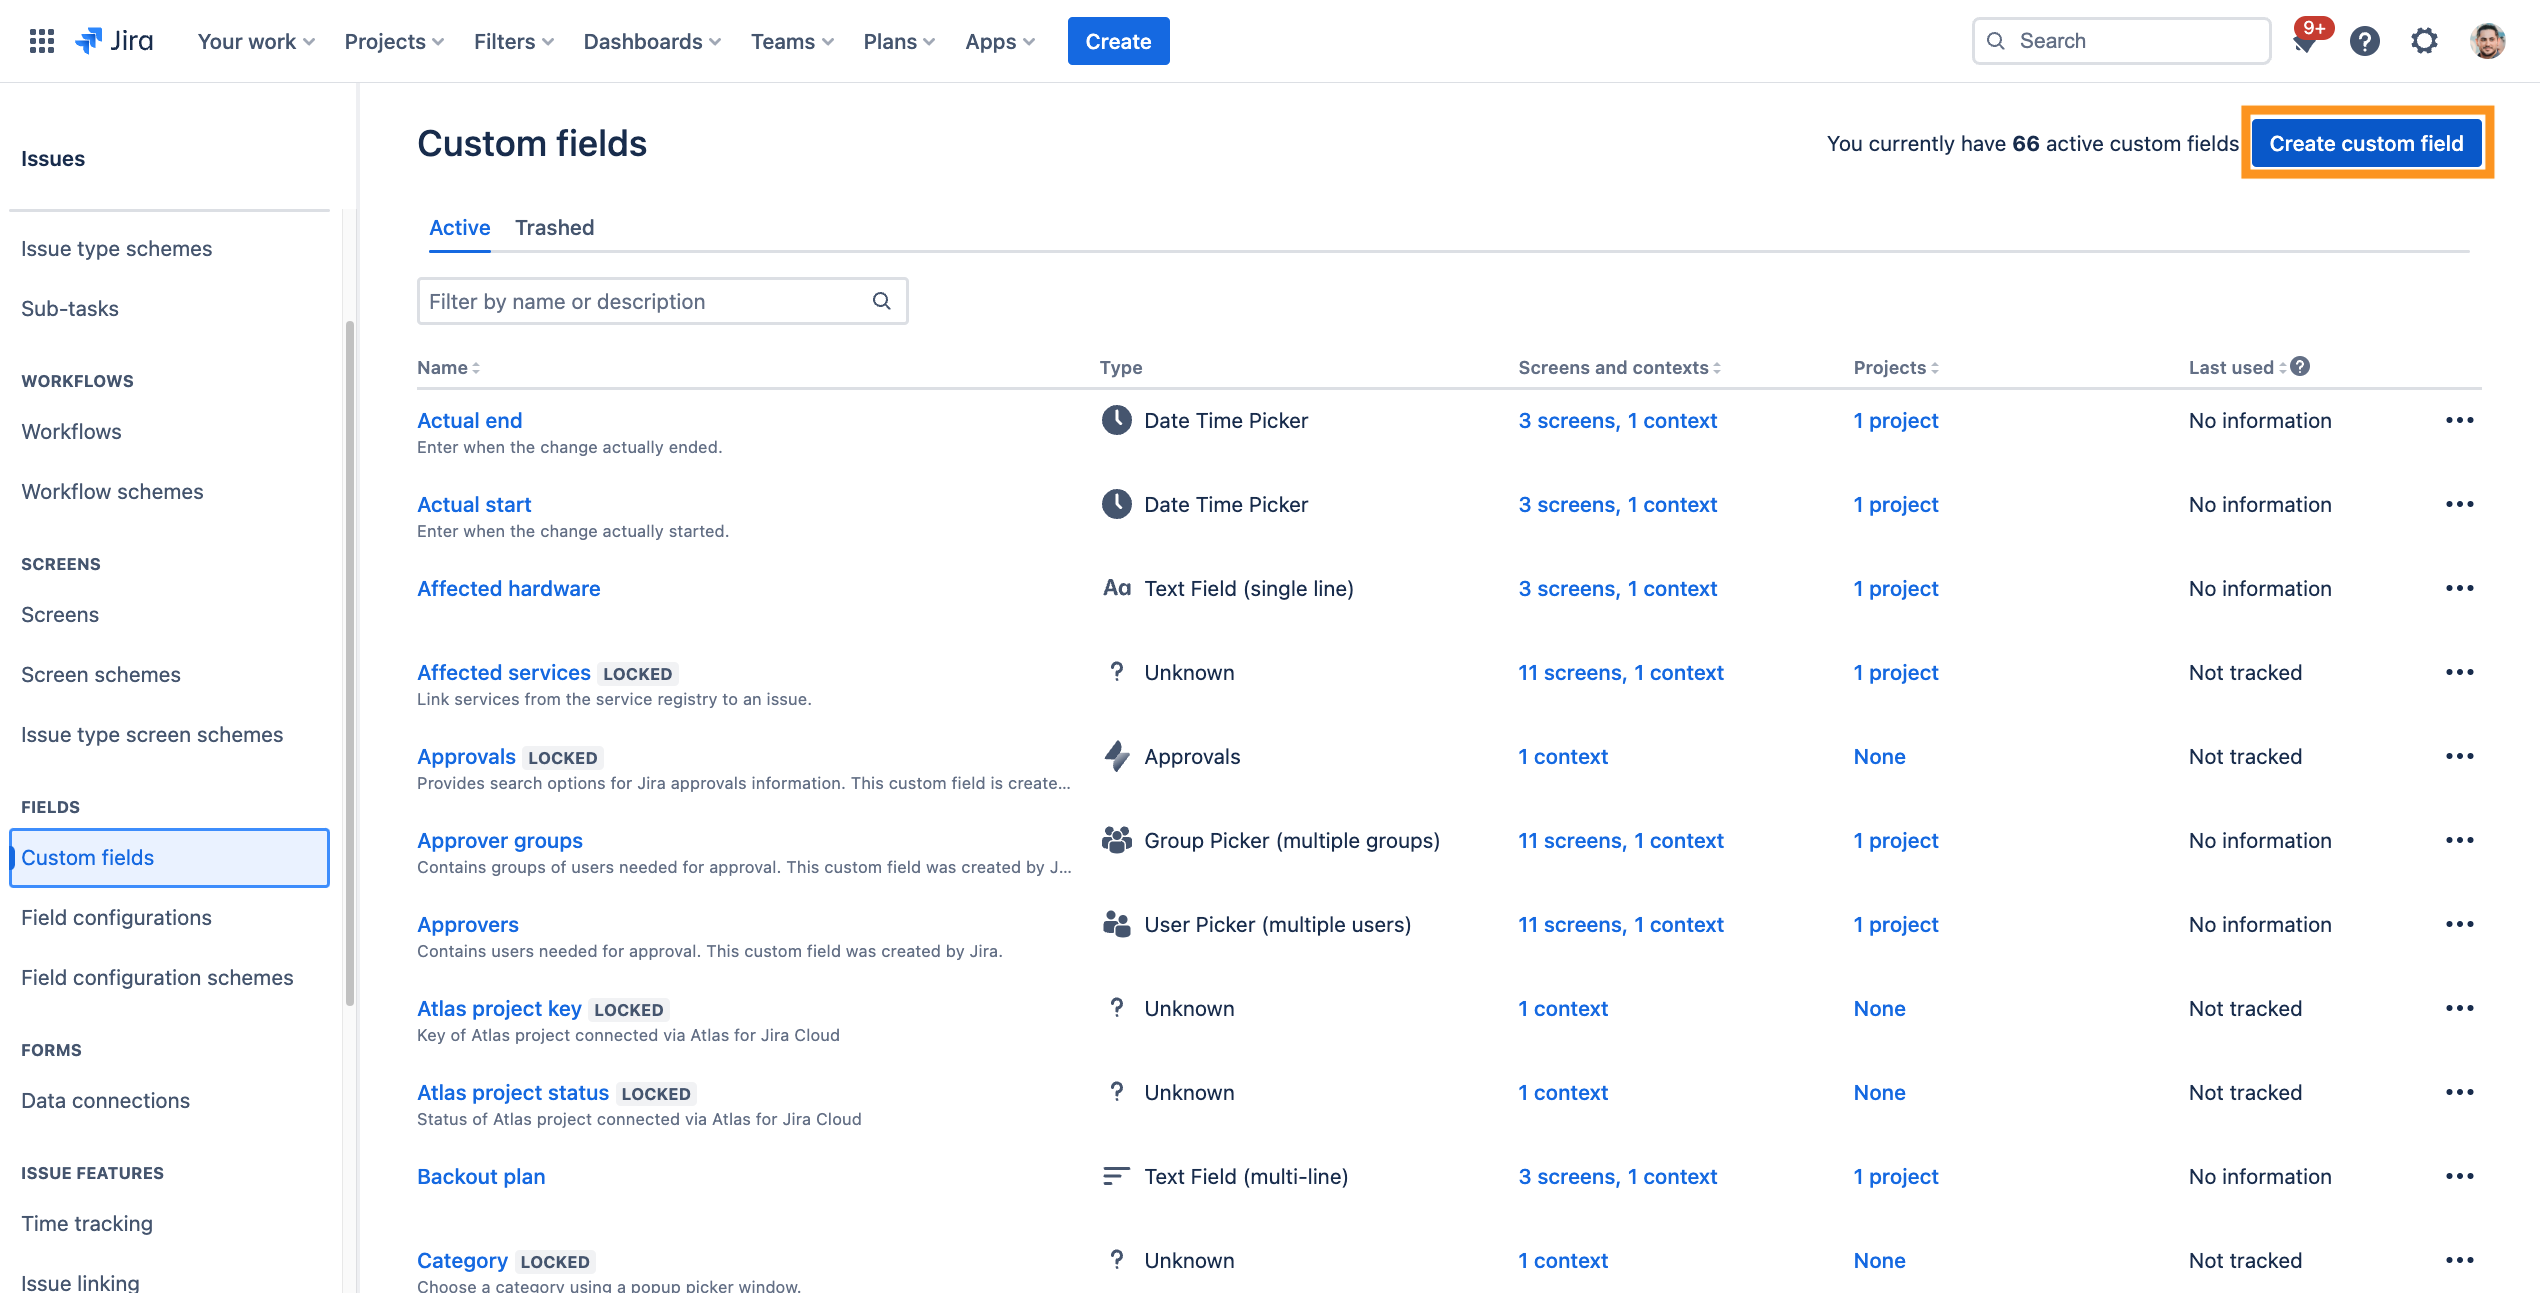
| 1 | In Jira, navigate to Admin Menu (cog wheel) → Issues → Custom fields | |
| 2 | Create new custom fields for the settings of SAP Transport Panel. → Click on Create custom field In oder to have access to all Field Types select All in the sidebar of the modal. A list of required fields is listed in the table Custom field overview below. |
|
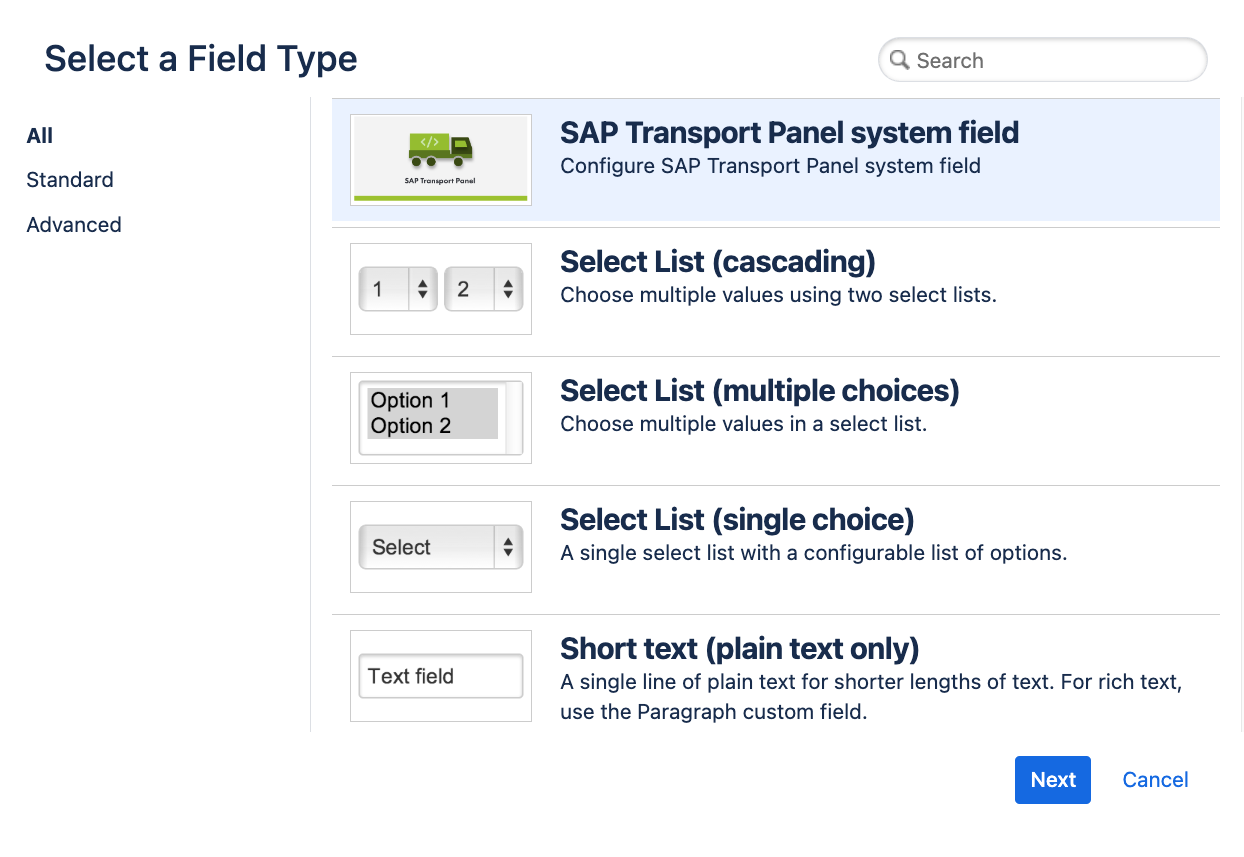
| 3 | Select a field type, e.g:
Then Click on Next |
|
| 4 | Add name and description. For example: System field | |
| 5 | After that you will get to the associate the field to a screen. Because we haven't created a dedicated screen for SAP Transport Panel you can just select Cancel for now. We explain how to associate your fields to the screen in this section. | |
| 6 | Repeat these steps and add all fields from the table Custom field overview below. |
Custom field overview
Following fields are necessary for the mapping of SAP transports and with SAP Transport Panel. Please note that all custom fields are required to be set up for SAP Transport Panel to work.
| Step | Custom field | Field Type | Content |
|---|---|---|---|
| 1 | System field | SAP Transport Panel System field (SAP Transport Panel Type) | Determines which configuration from SAP system and SAP project should be addressed for transports linked to the issue. This field is set as required, because a SAP system is necessary for the communication with SAP. If no system and project are selected all SAP Transport Panel feature result in an error. |
| 2 | Create Transport | Select List (single choice) | This field comes with three options:
The custom field is configured in a transition screen for the Create Transport post function. The user can choose whether or not a transport should be created.
|
| 3 | Return code | String Return Code |
|
| 4 | Emergency change | Select List (single choice) | When a selection in the custom field was made, the SAP Admin gets an email that this was an emergency change. The possible options have to be:
|
| 5 | Further information | Paragraph(supports rich text) | This field can be edited with secondary information (e.g. about the import). This information will be added to the email that the SAP admin receives. |
Associate the Create Transport and Return code custom field to SAP Transport Panel
| Step | Procedure | Example |
|---|---|---|
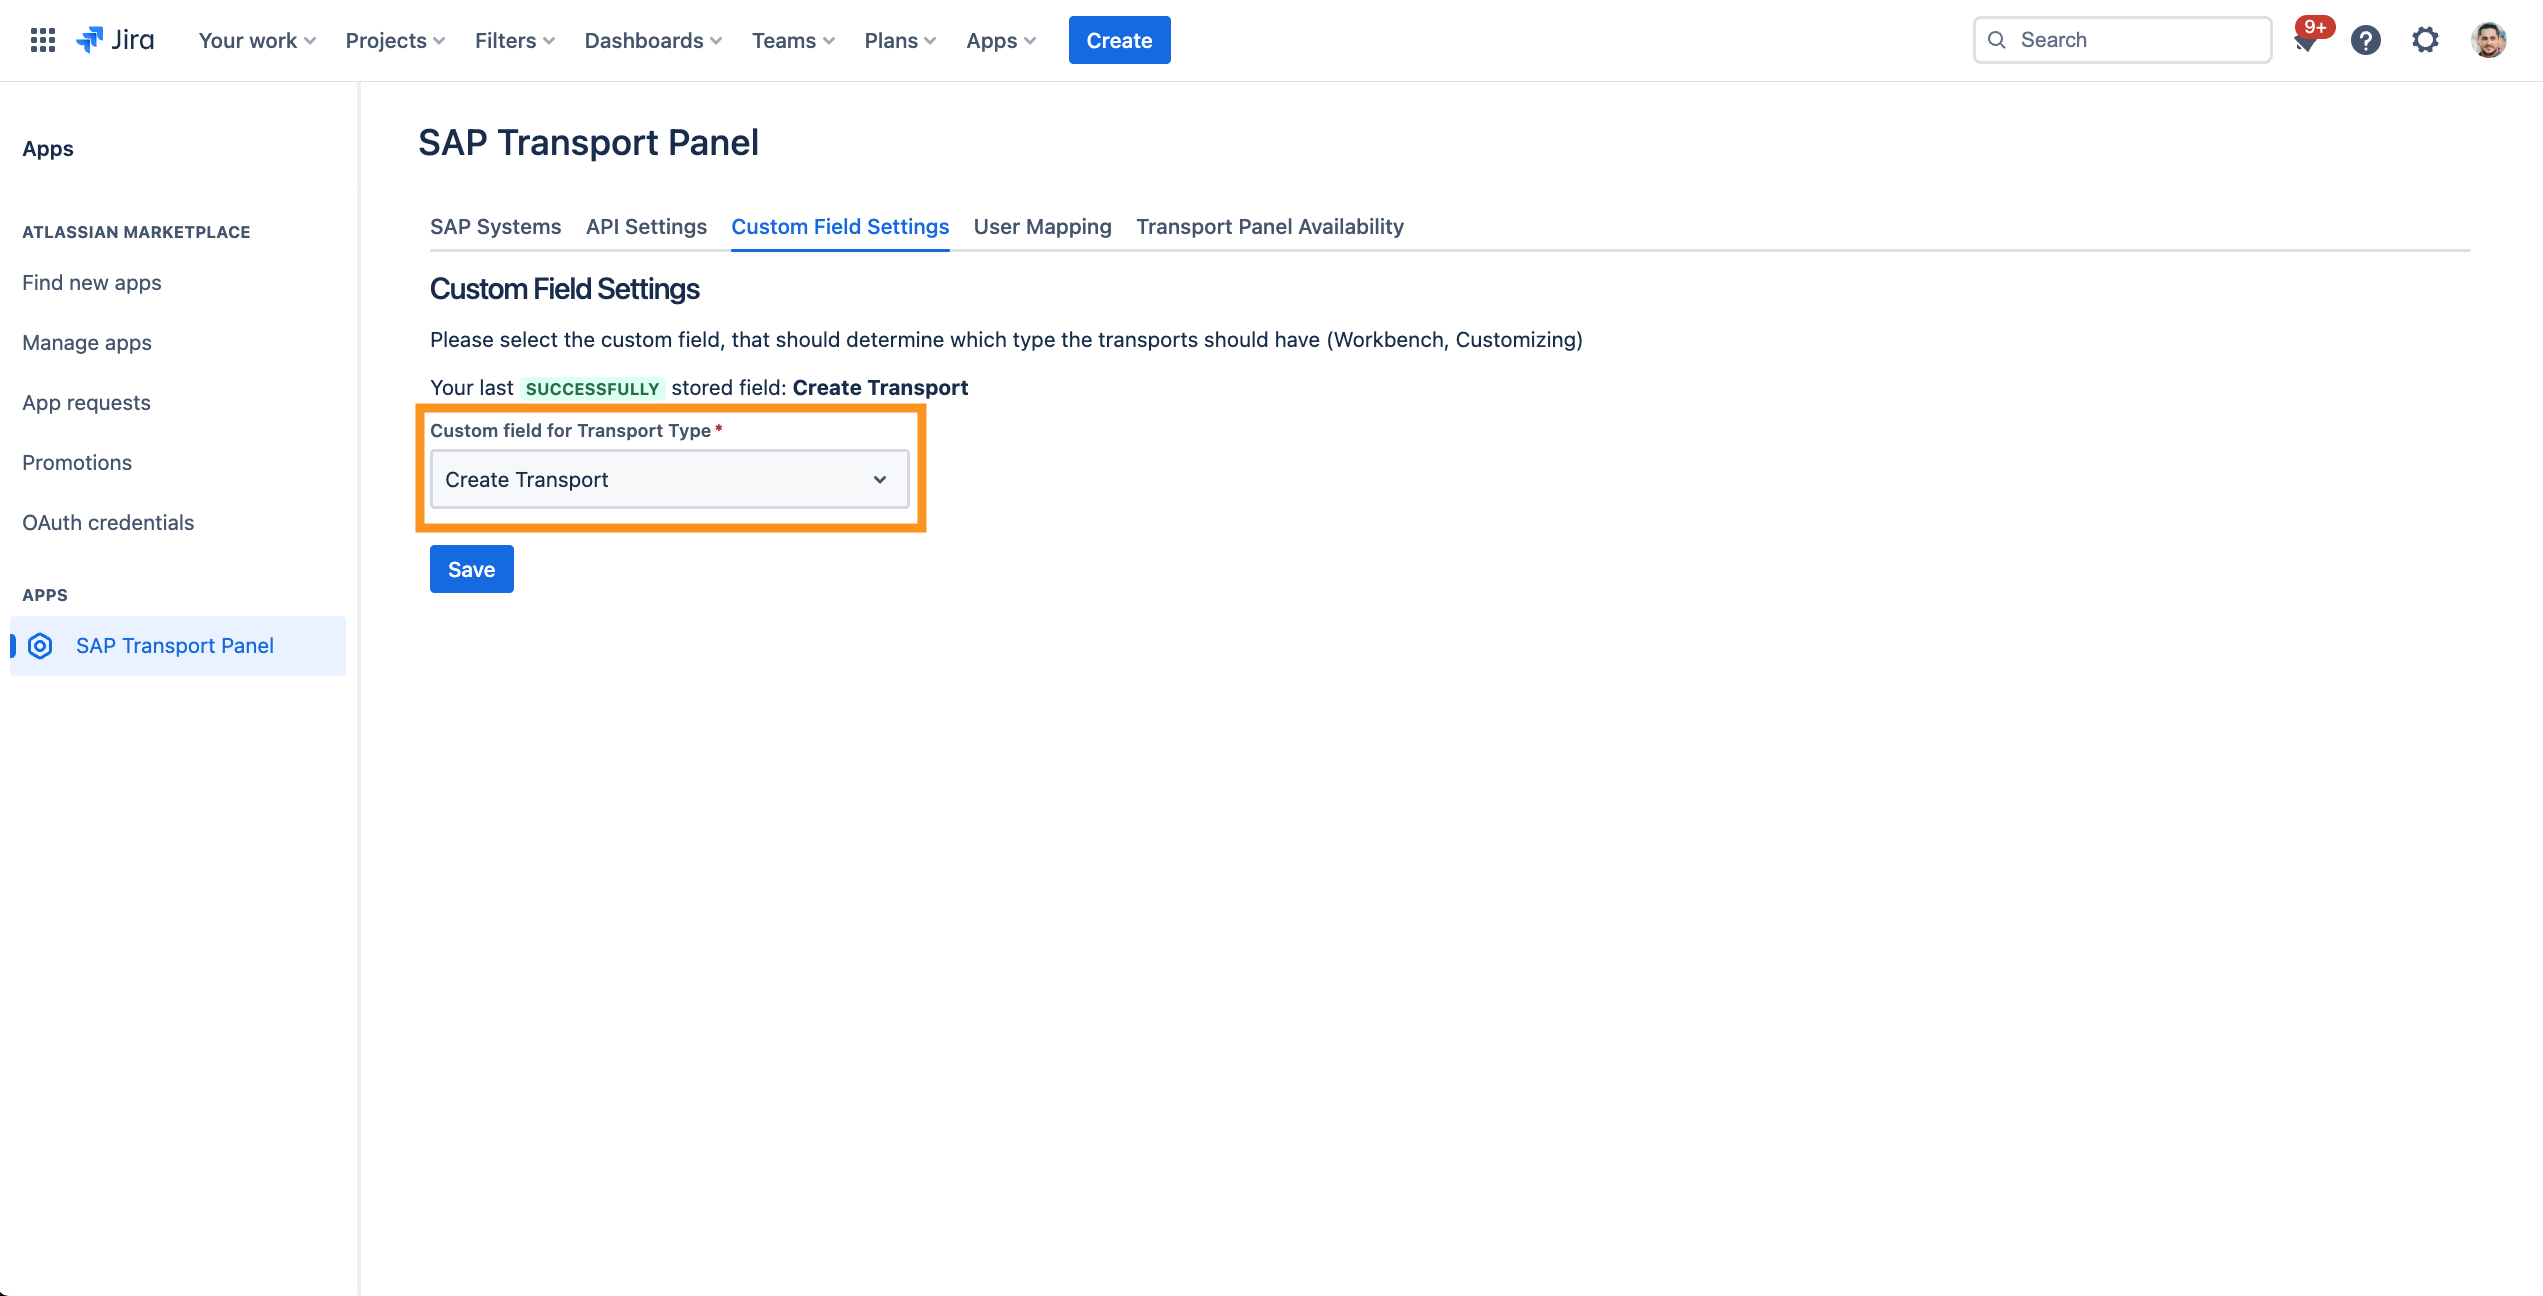
| 1 | In Jira, navigate to Admin Menu (cog wheel) → Apps → Manage apps → SAP Transport Panel | |
| 2 | Choose the tab Custom Field Settings and select the custom field Create Transport from the dropdown menu |
|
Create field configurations for the issue types
Creation of field configurations for the relevant issue types. This prevents SAP Transport Panel from encountering errors when creating the transport of copies, which can be caused by changes to the Default Field Configuration (e.g. new required fields).
Further information → Associate field behavior with an issue type
| Step | Procedure | Example |
|---|---|---|
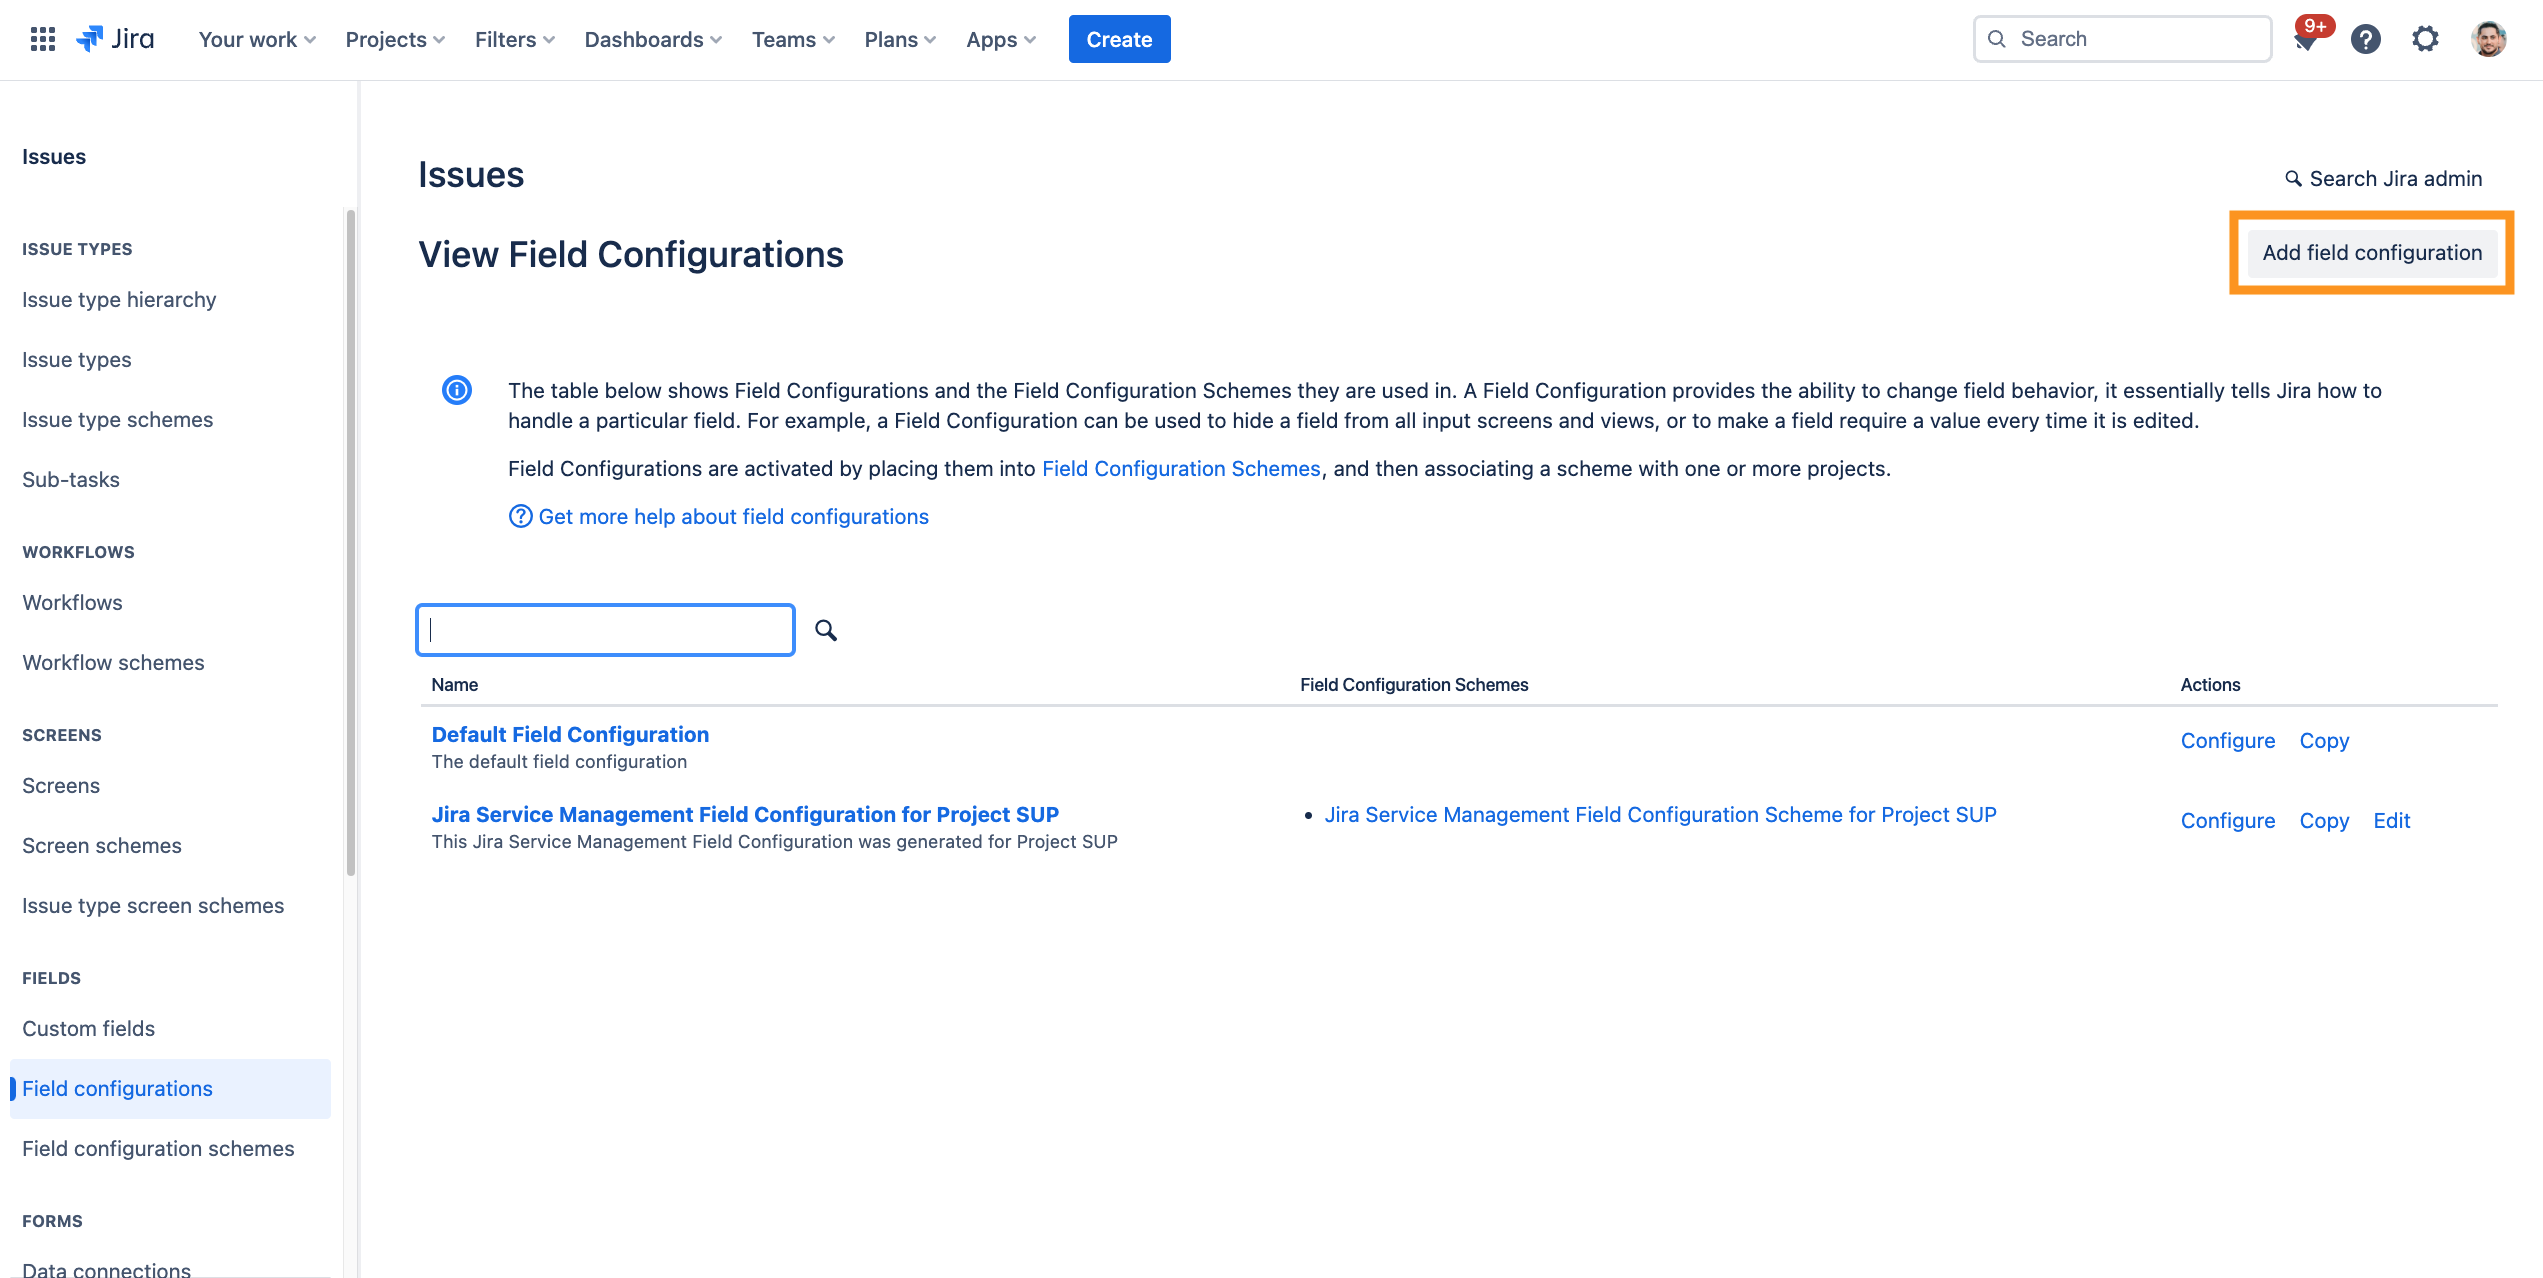
| 1 | In Jira, navigate to Admin Menu (cog wheel) → Issues → Field configurations | |
| 2 | Click the Add field configuration button. |
|
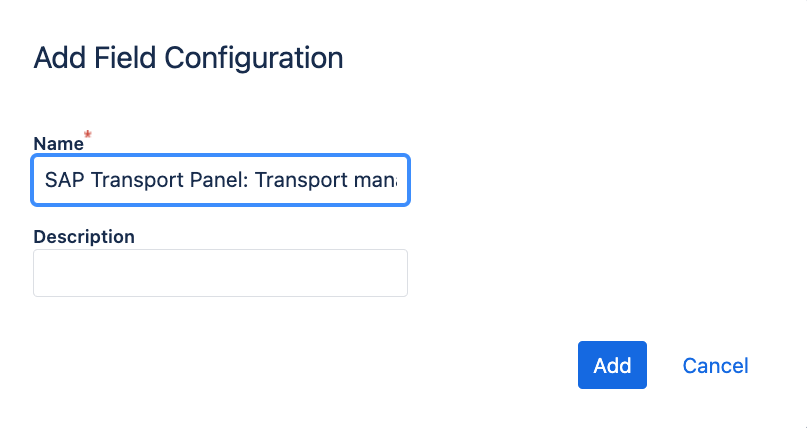
| 3 | Add name and description. For example: SAP Transport Panel: Transport management click on Add |
|
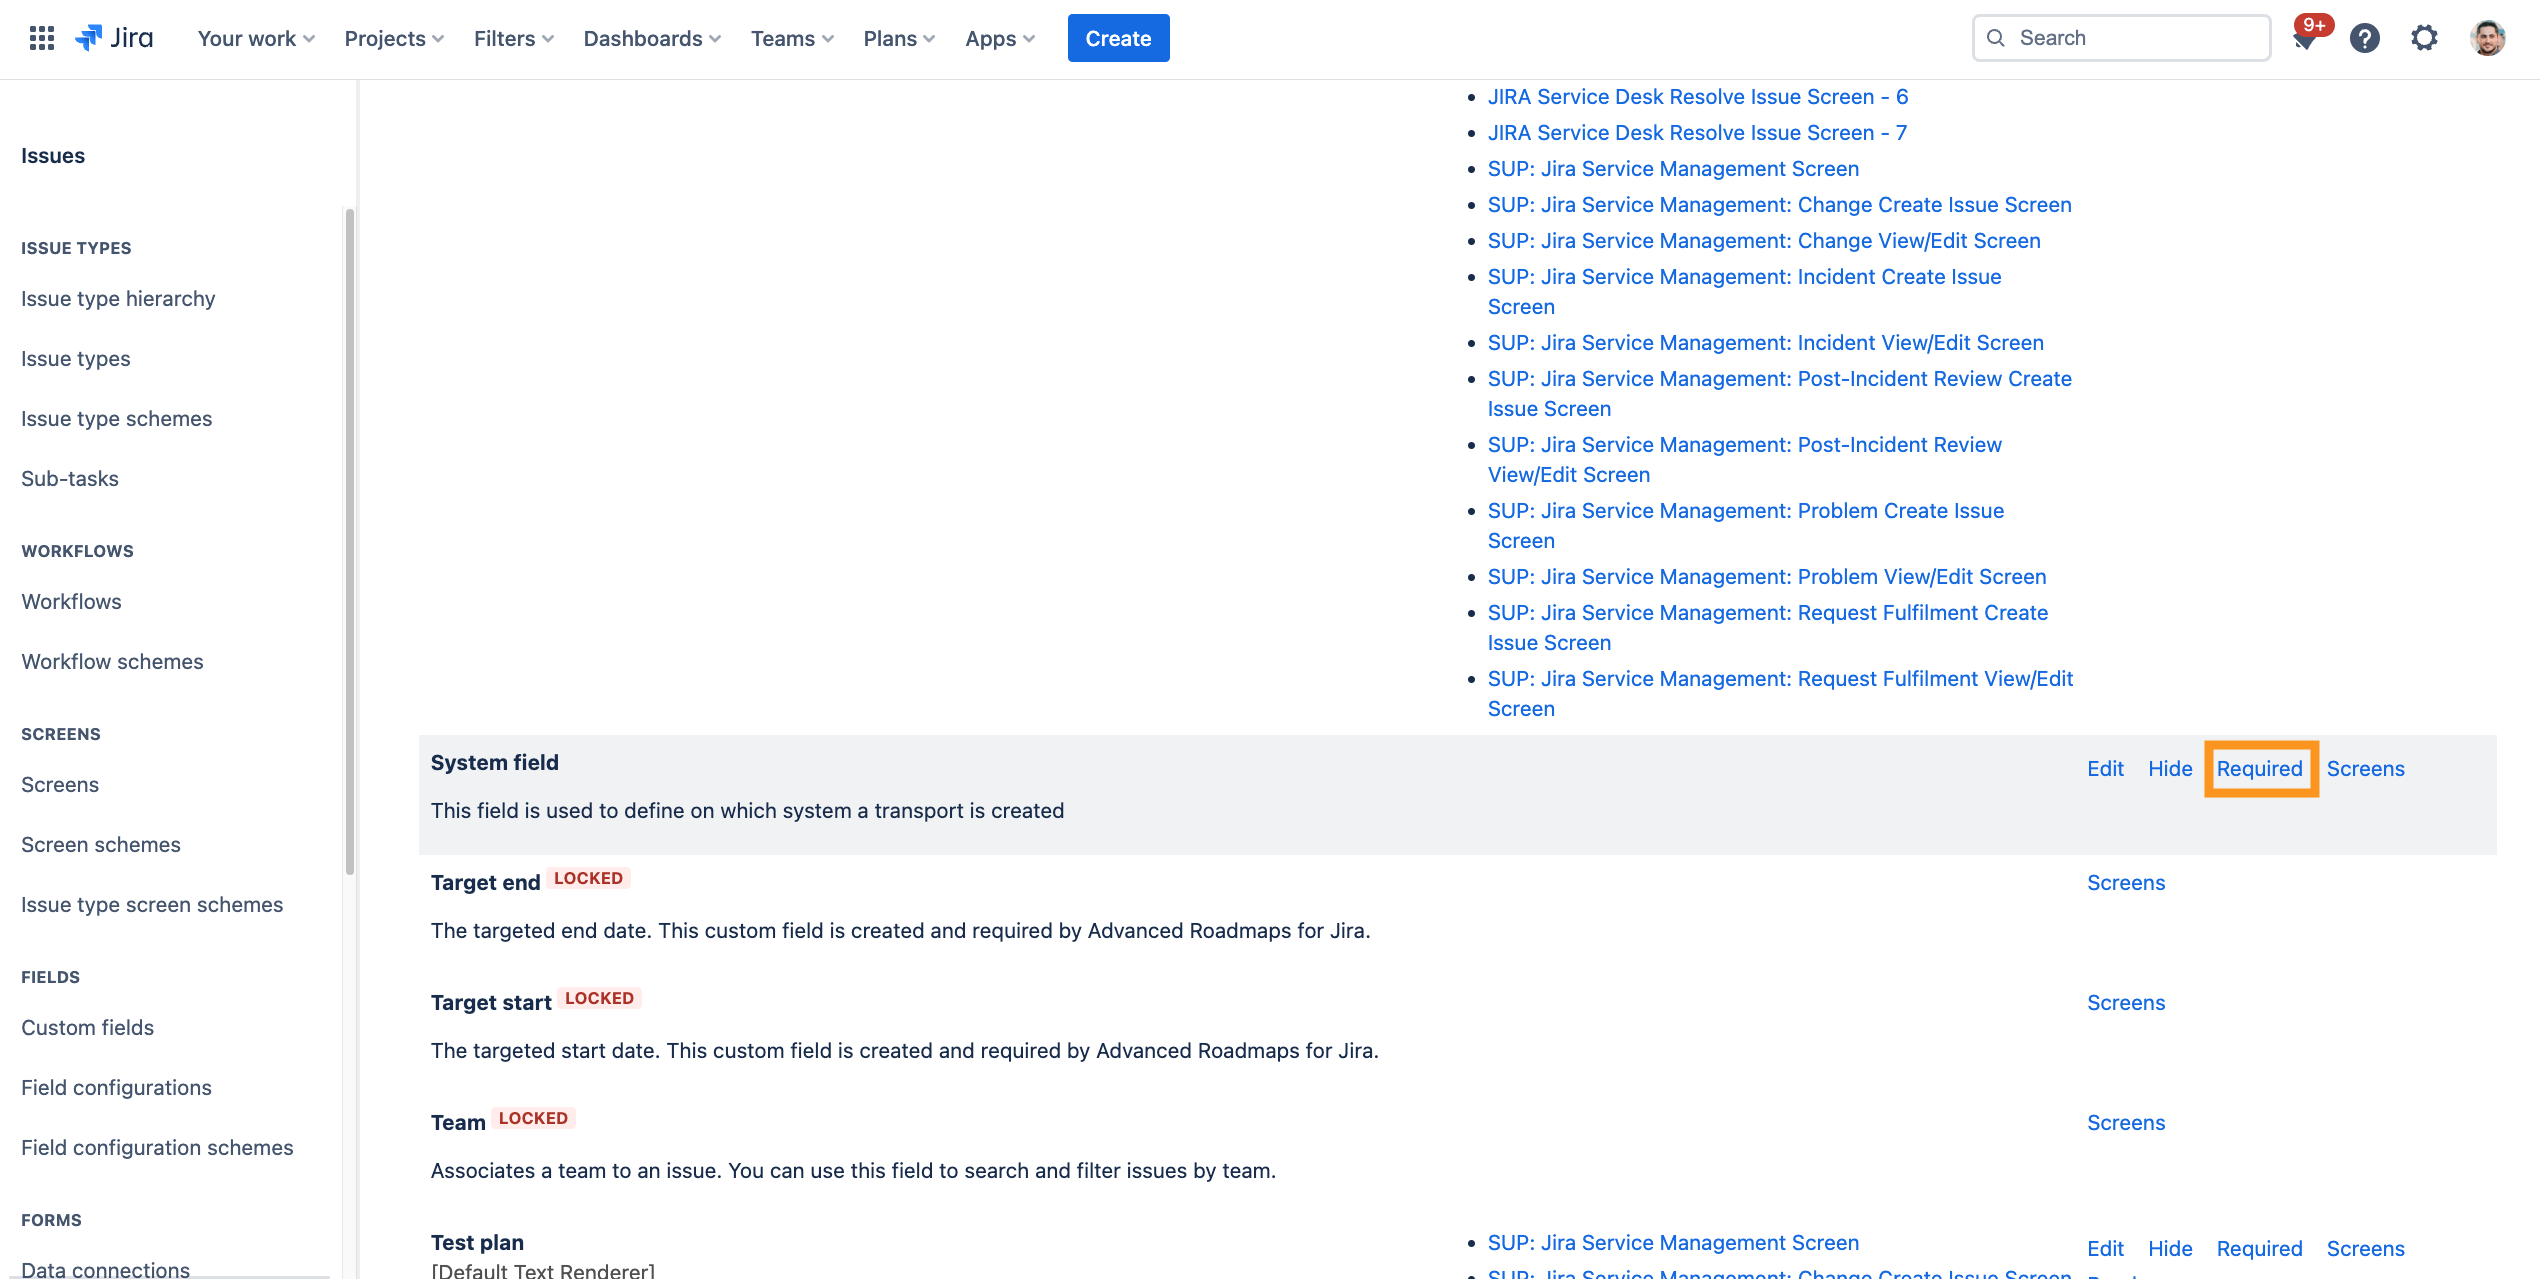
| 4 | Locate the System field and click the Required link to make it a mandatory field. |
|
Associate the issue types with the field configurations
To use the custom fields for SAP Transport Panel the field configuration needs to be associated to the Jira issue types.
Further information → Configure a field configuration scheme
| Step | Procedure | Example |
|---|---|---|
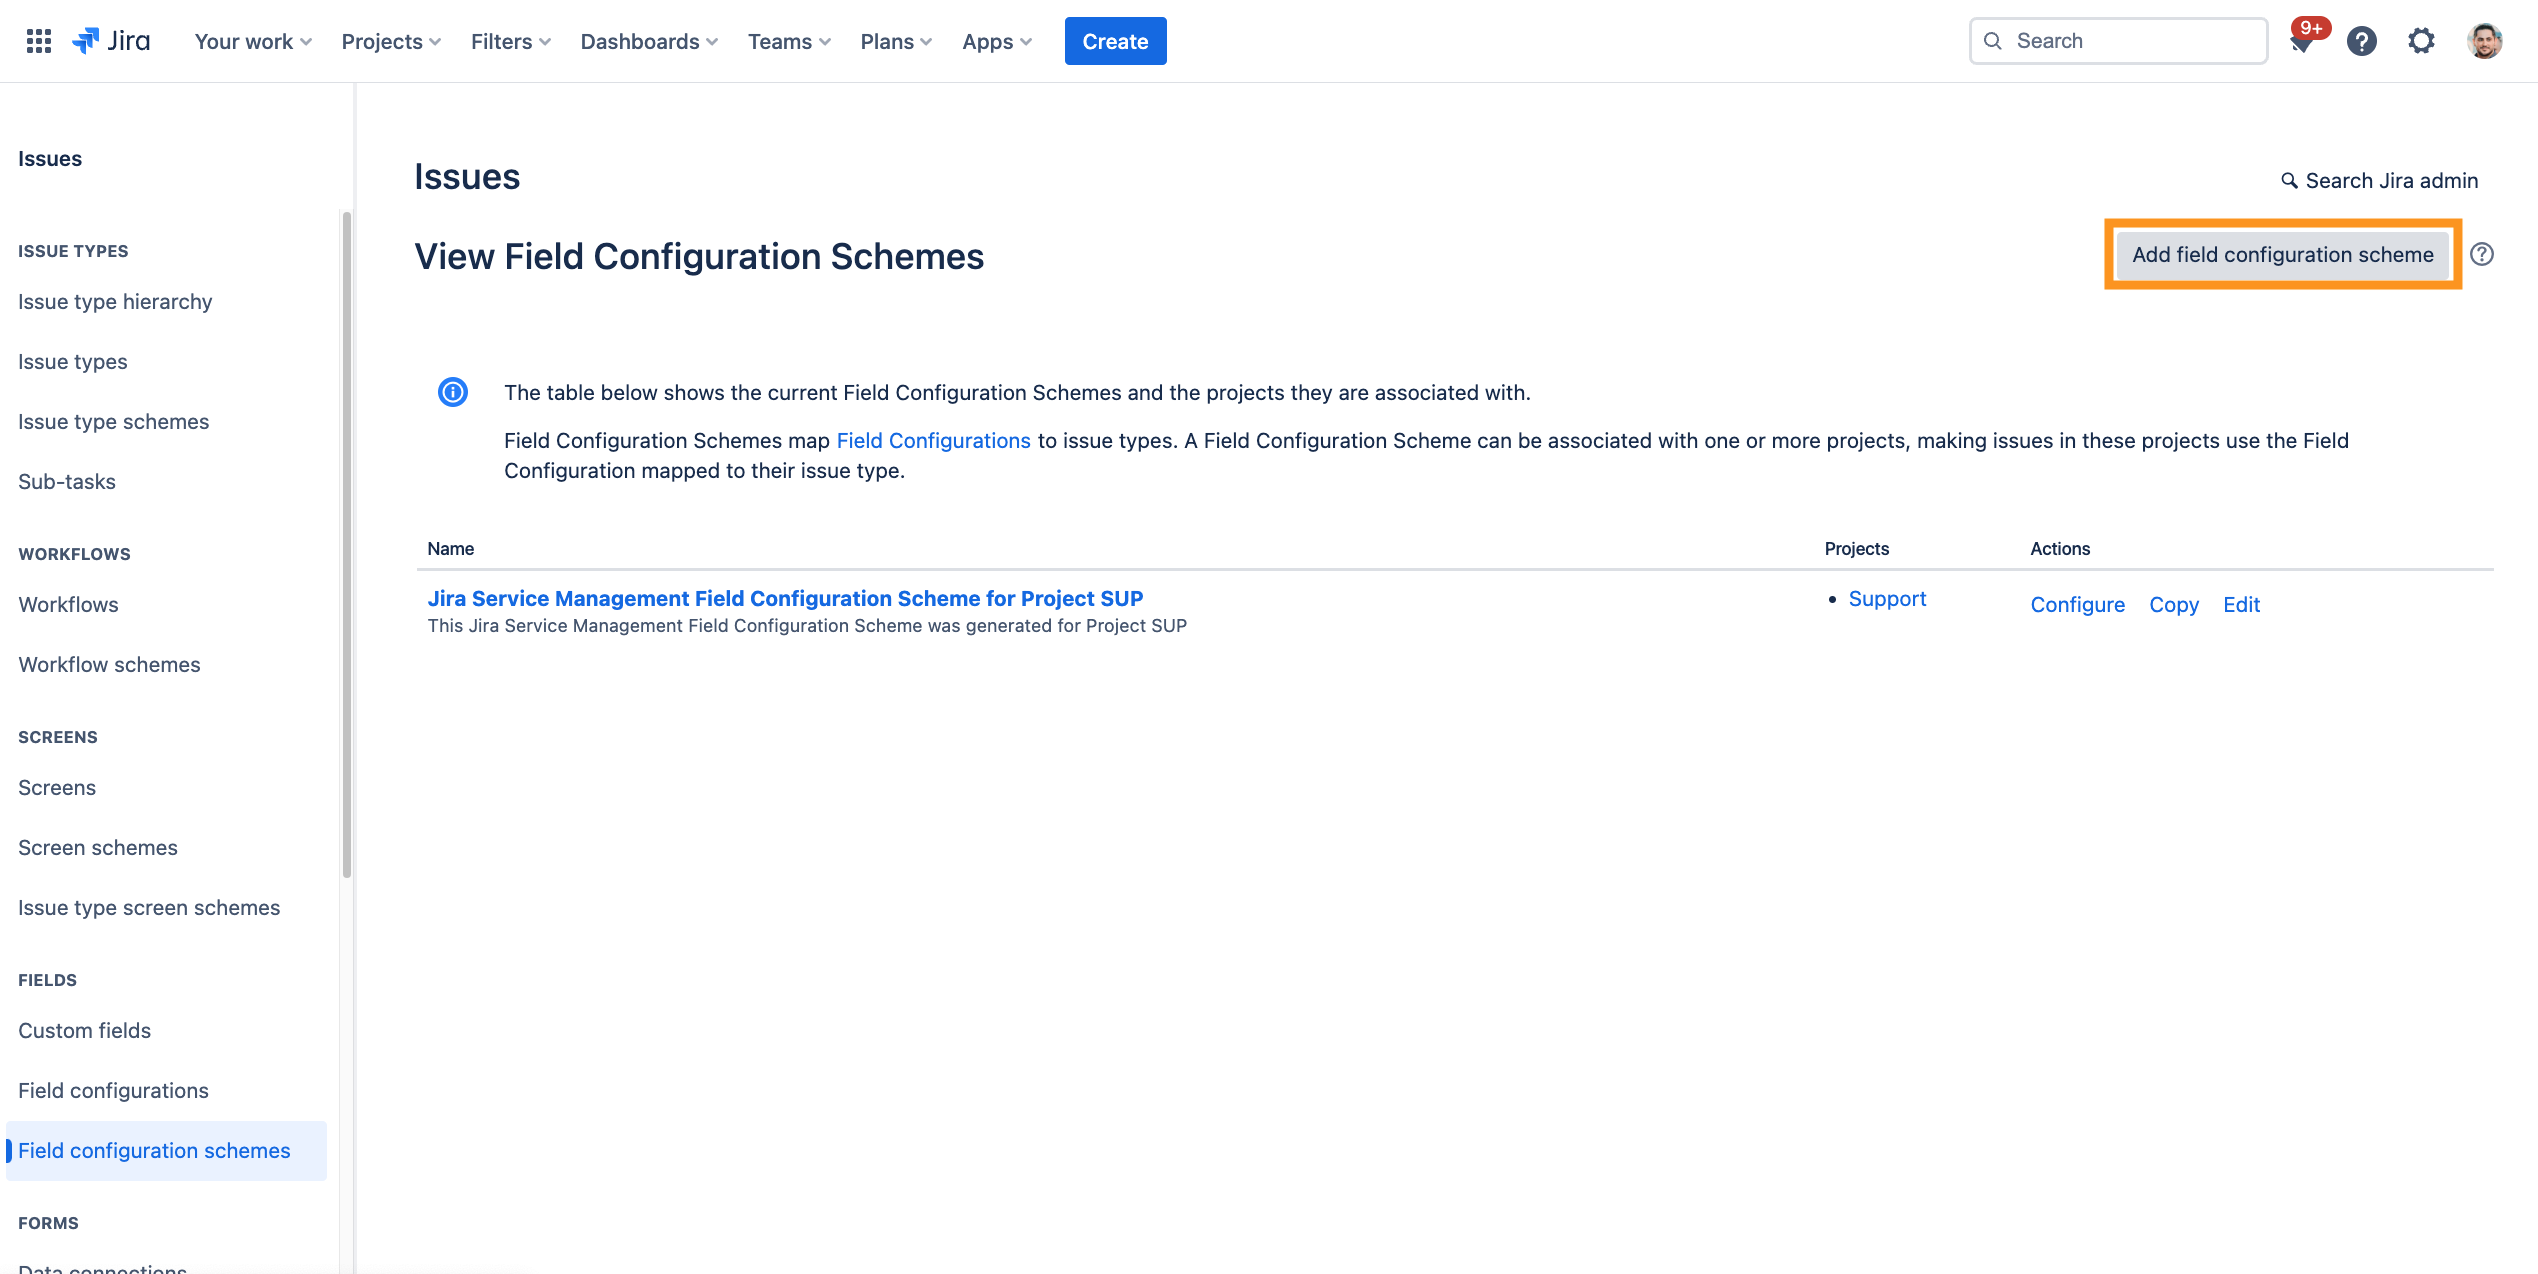
| 1 | In Jira, navigate to Admin Menu (cog wheel) → Issues → Field configurations schemes | |
| 2 | Create a field configuration scheme via click on the Add field configuration scheme button. |
|
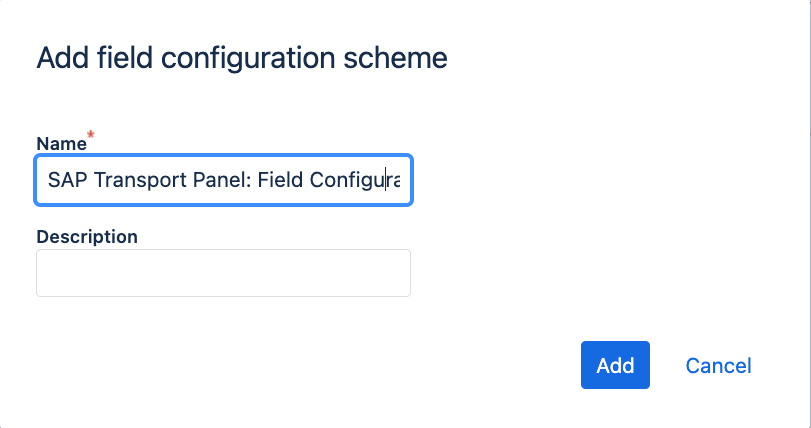
| 3 | Add name and description (e.g. SAP Transport Panel: Field Configuration Scheme). → Click on Add. |
|
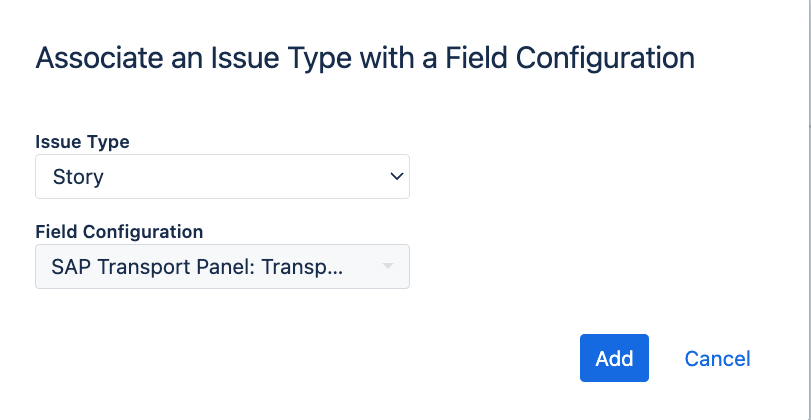
| 4 | Link the issue types in the assignment dialog to the new field configurations. Then click on Associate an issue type with a field configuration. Select the issue type and the field configuration. Then click Add and repeat for the all of the following issue types:
|
|
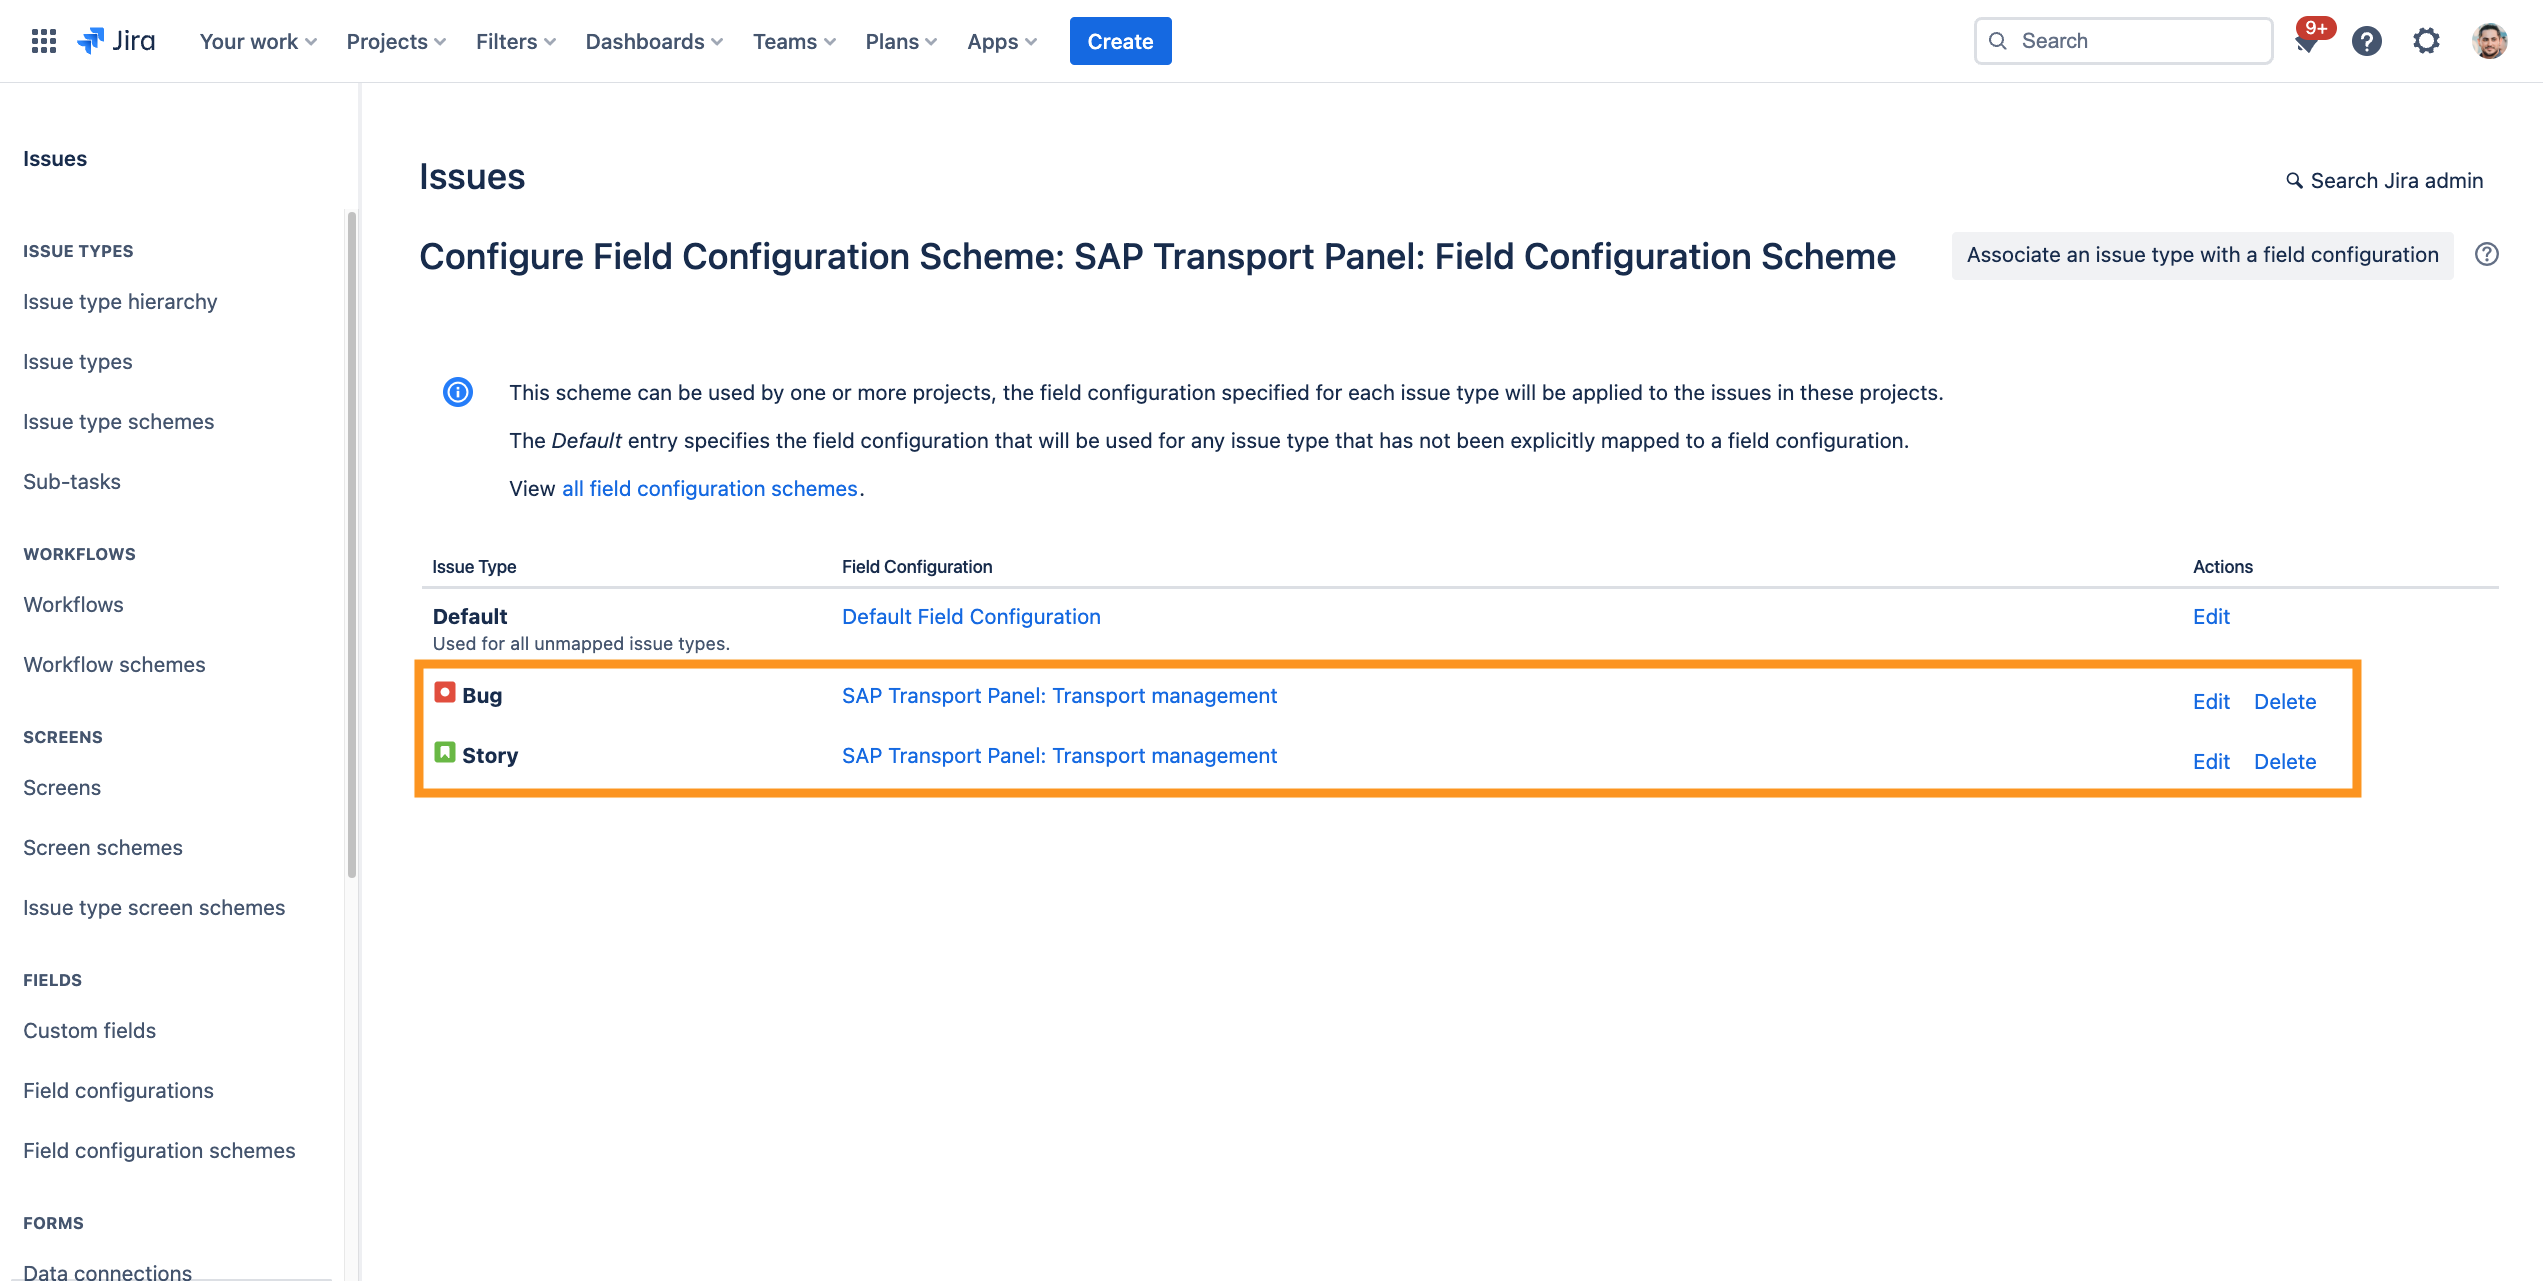
| 5 | The final configuration should look like in the example to the right. |
|
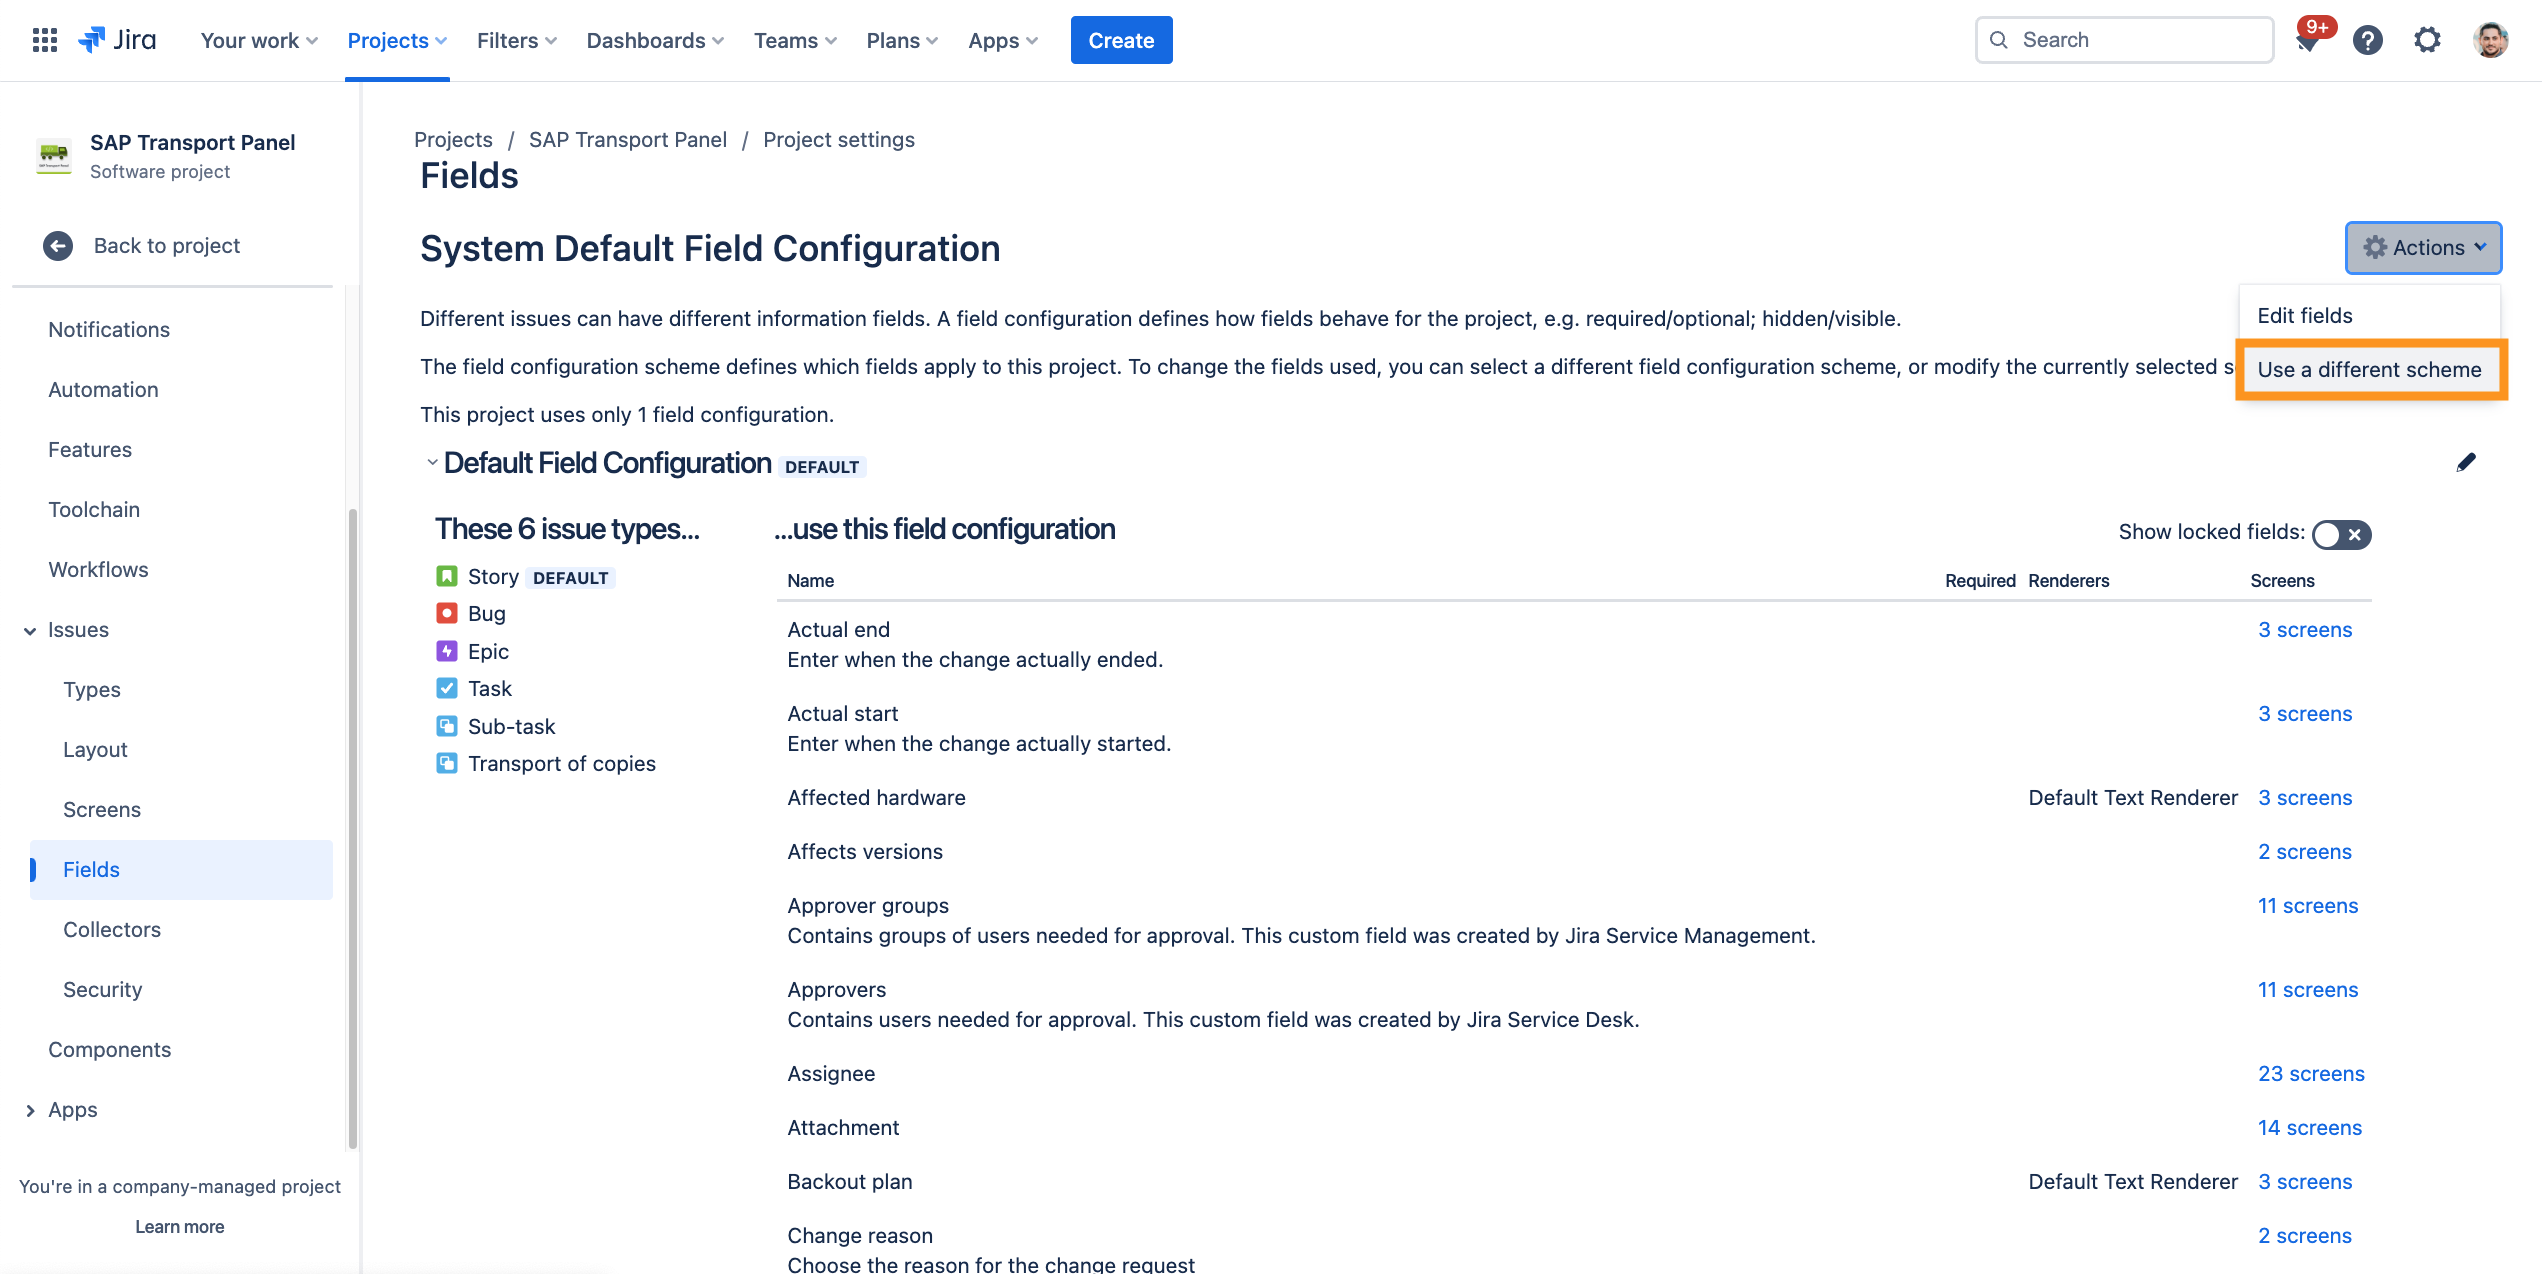
Associate the field configuration scheme to the Jira project
The final step to use the custom fields is to associate the field configuration scheme to the Jira project.
Further information → Atlassian documentation: Associating a field configuration scheme with a project
| Step | Procedure | Example |
|---|---|---|
| 1 | In Jira, navigate to Projects → SAP Transport Panel Project → Project settings(sidebar) → Issues → Fields | |
| 2 | Click on Actions → Use a different scheme and then select the SAP Transport Panel: Field Configuration Scheme. |
|