CLOUD Configure SAP Systems
Step-by-Step Guide
In this configuration multiple systems and transport targets can be added. This makes it possible to address an individual system and transport target for each transport link in Jira.
| Step | Procedure | Example |
|---|---|---|
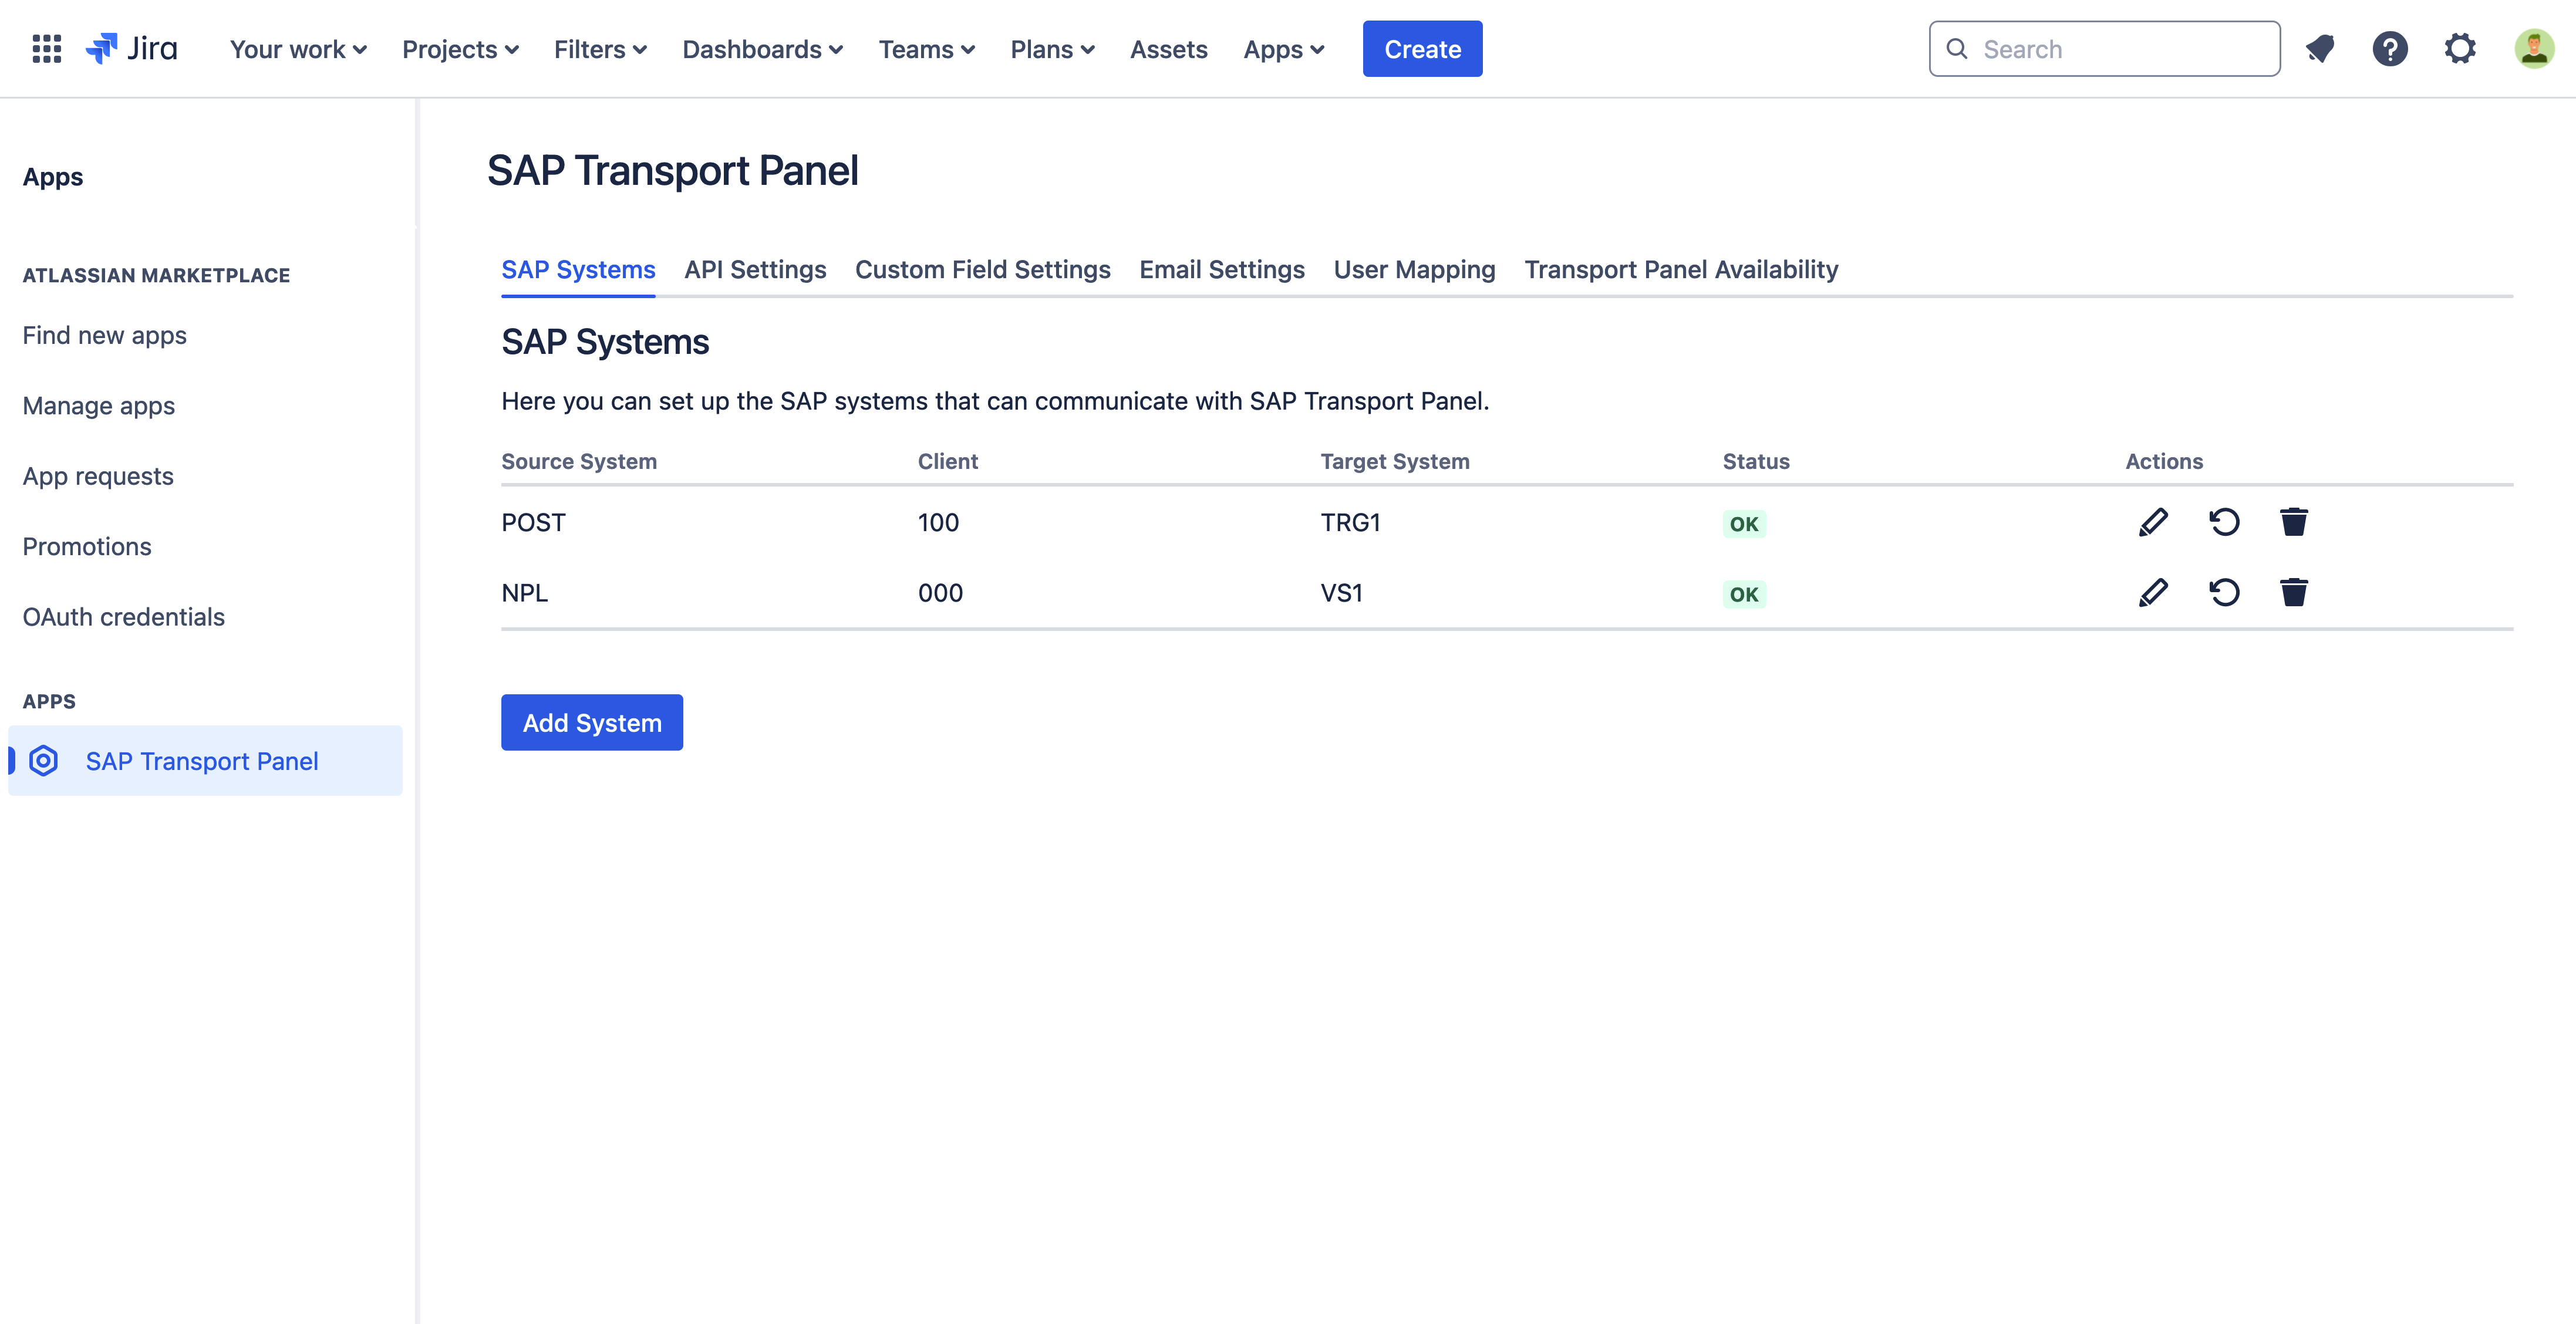
| 1 | In Jira, navigate to Admin Menu (cog wheel) → Apps → SAP Transport Panel → SAP Systems. |
|
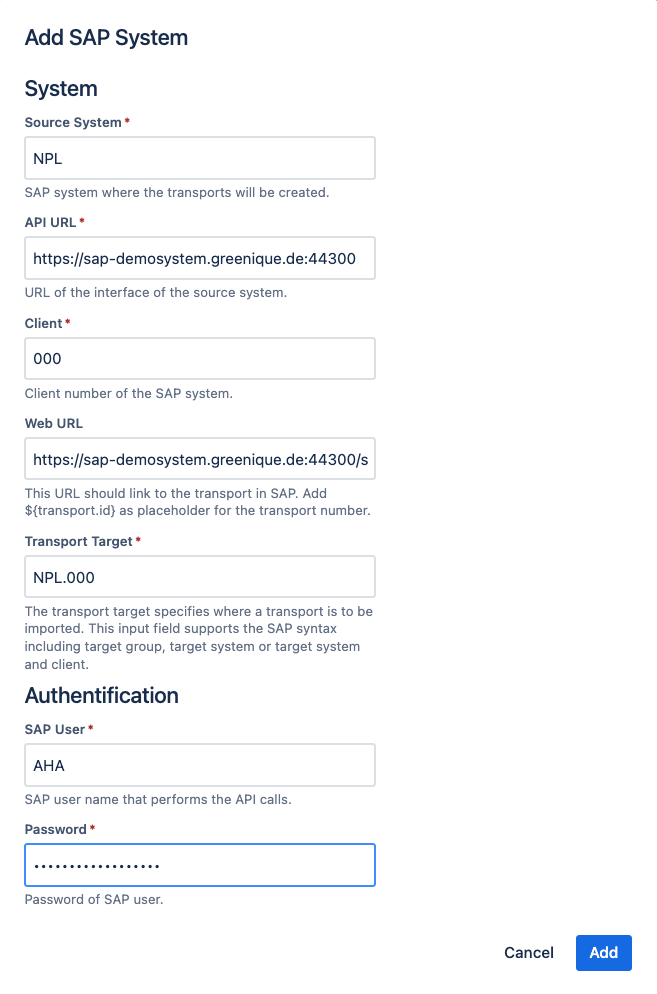
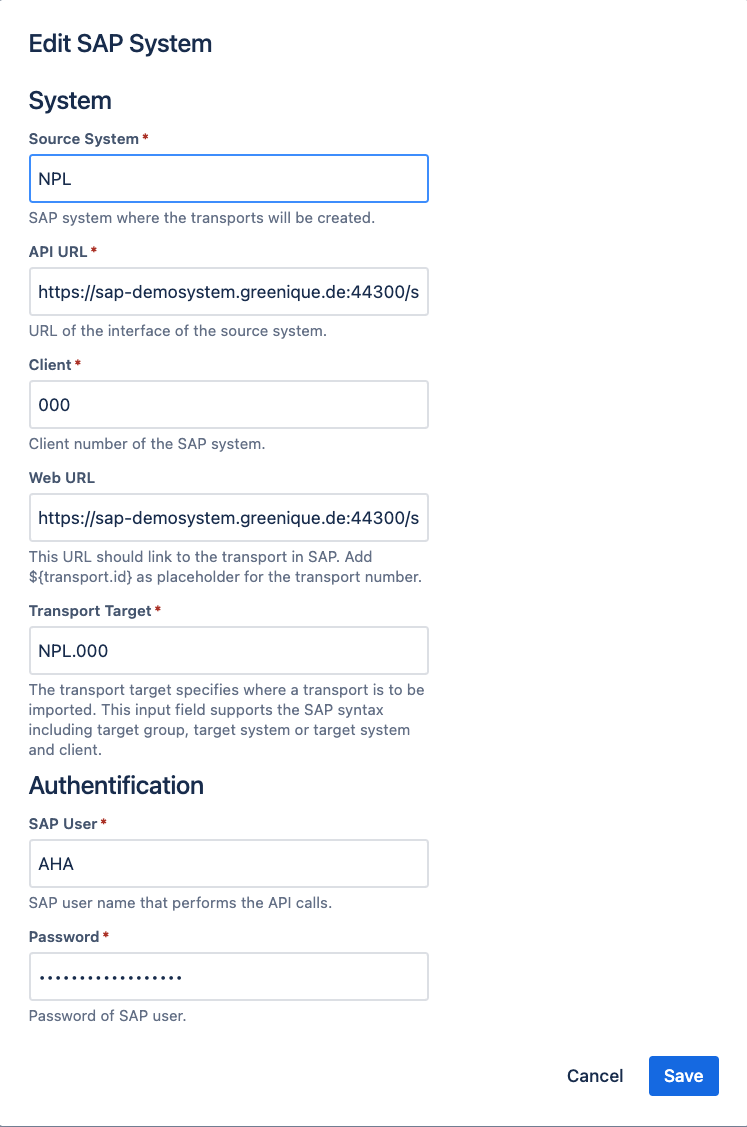
| 2 | Click on Add System and input the mandatory fields for the SAP System in the modal dialog. A detailed explanation of the fields is listed in the chapters SAP interface configuration. |
|
| 3 | Save your settings via click on Add. | Multiple SAP systems Multiple SAP systems can be created and saved. |
SAP interface configuration
The SAP interface configuration is the general configuration for the connection of Jira and SAP.
System | ||||||||||||||
|---|---|---|---|---|---|---|---|---|---|---|---|---|---|---|
Field | Example | Description | ||||||||||||
| Source System |
| SAP System ID on which transports are to be managed. This name is transferred to the interface. | ||||||||||||
API URL |
| API URL of the Source System. The back part of the URL is always set by SAP Transport Panel. Therefore the base URL for the SAP connection should look like following example: | ||||||||||||
Client |
| Parameter client of the SAP interface. | ||||||||||||
Web URL |
| URL that will be stored in the Transport Panel of the linked issue. The URL consists of the API URL (https://<host>:<port>), the client (<client>), a static part and a placeholder for the Transport ID URL with place holders (<>)
https://sap-demosystem.greenique.de:44300/sap/bc/gui/sap/its/webgui/?%7etransaction=SE01%20TRDYSE01SN-TR_TRKORR%3d${transport.id}&%7eOKCODE=SINGLE_REQUEST%3f&sap-client=000 | ||||||||||||
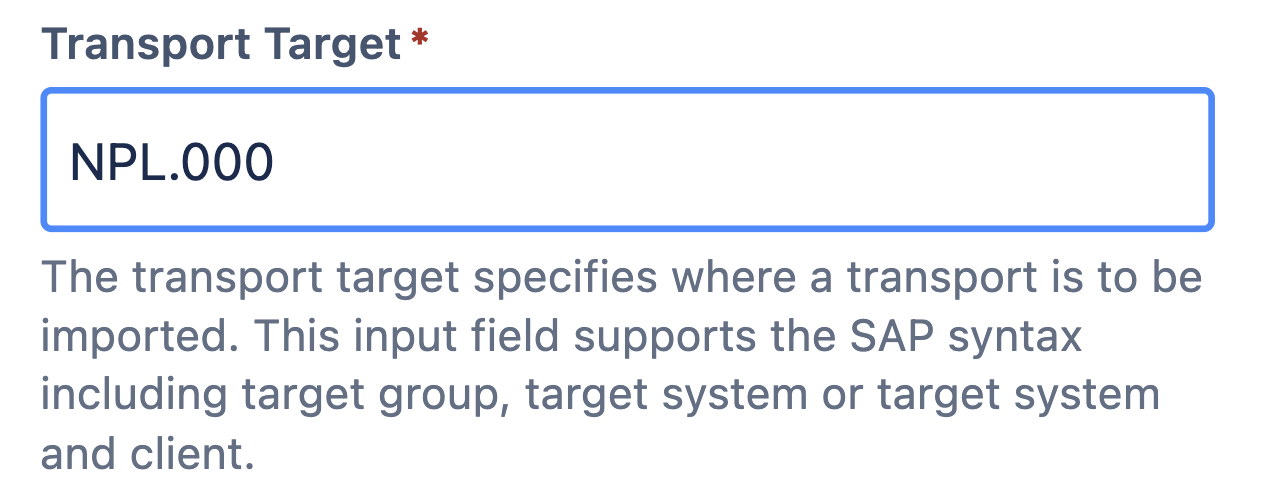
| Transport target |
| The transport target specifies where a transport is to be imported. This selection supports the SAP Syntax including Target group, Target system or Target system and client.
| ||||||||||||
Authentification | ||||||||||||||
Field | Example | Description | ||||||||||||
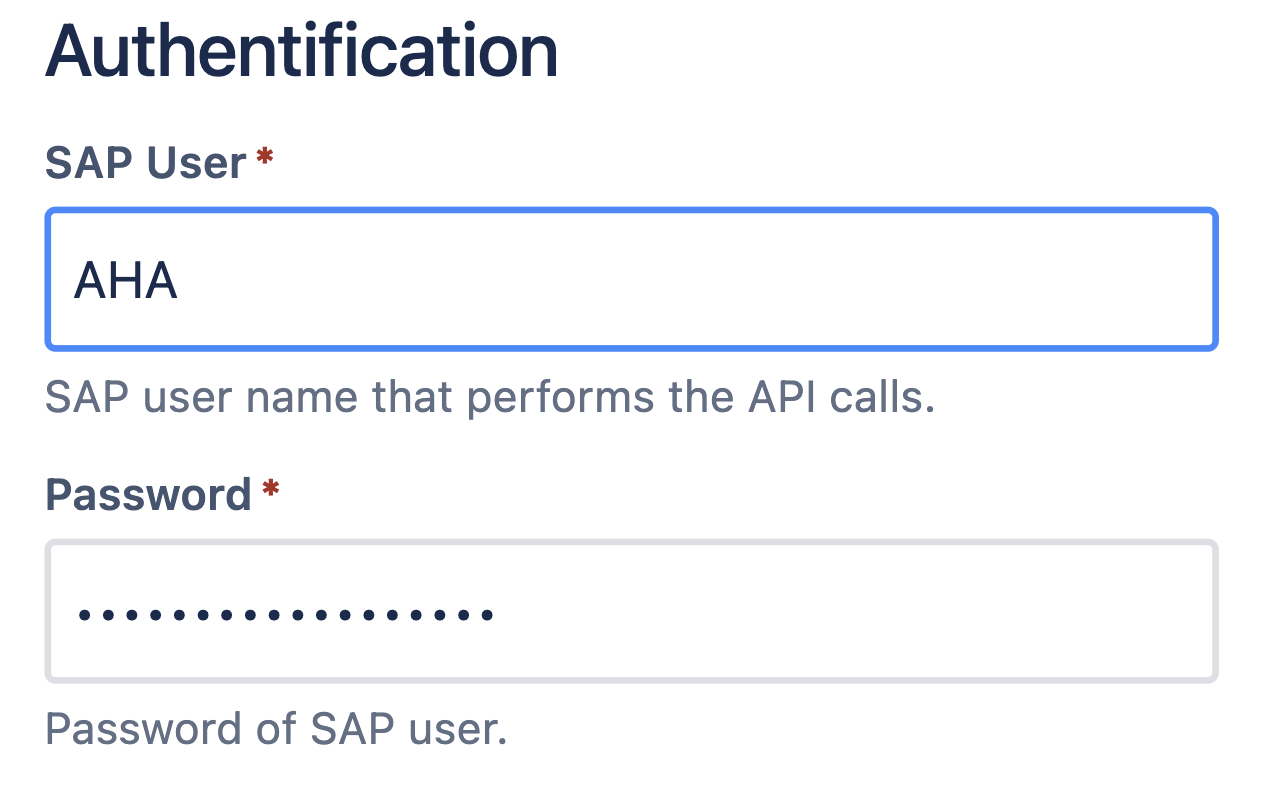
| SAP User and Password |
| The SAP system user with matching permissions to the SAP project. This user will be executing the SAP Transport Panel actions such as creating, copying and releasing transports in SAP. If changes to access data are cancelled, the previously saved password will remain. | ||||||||||||
Edit system configuration
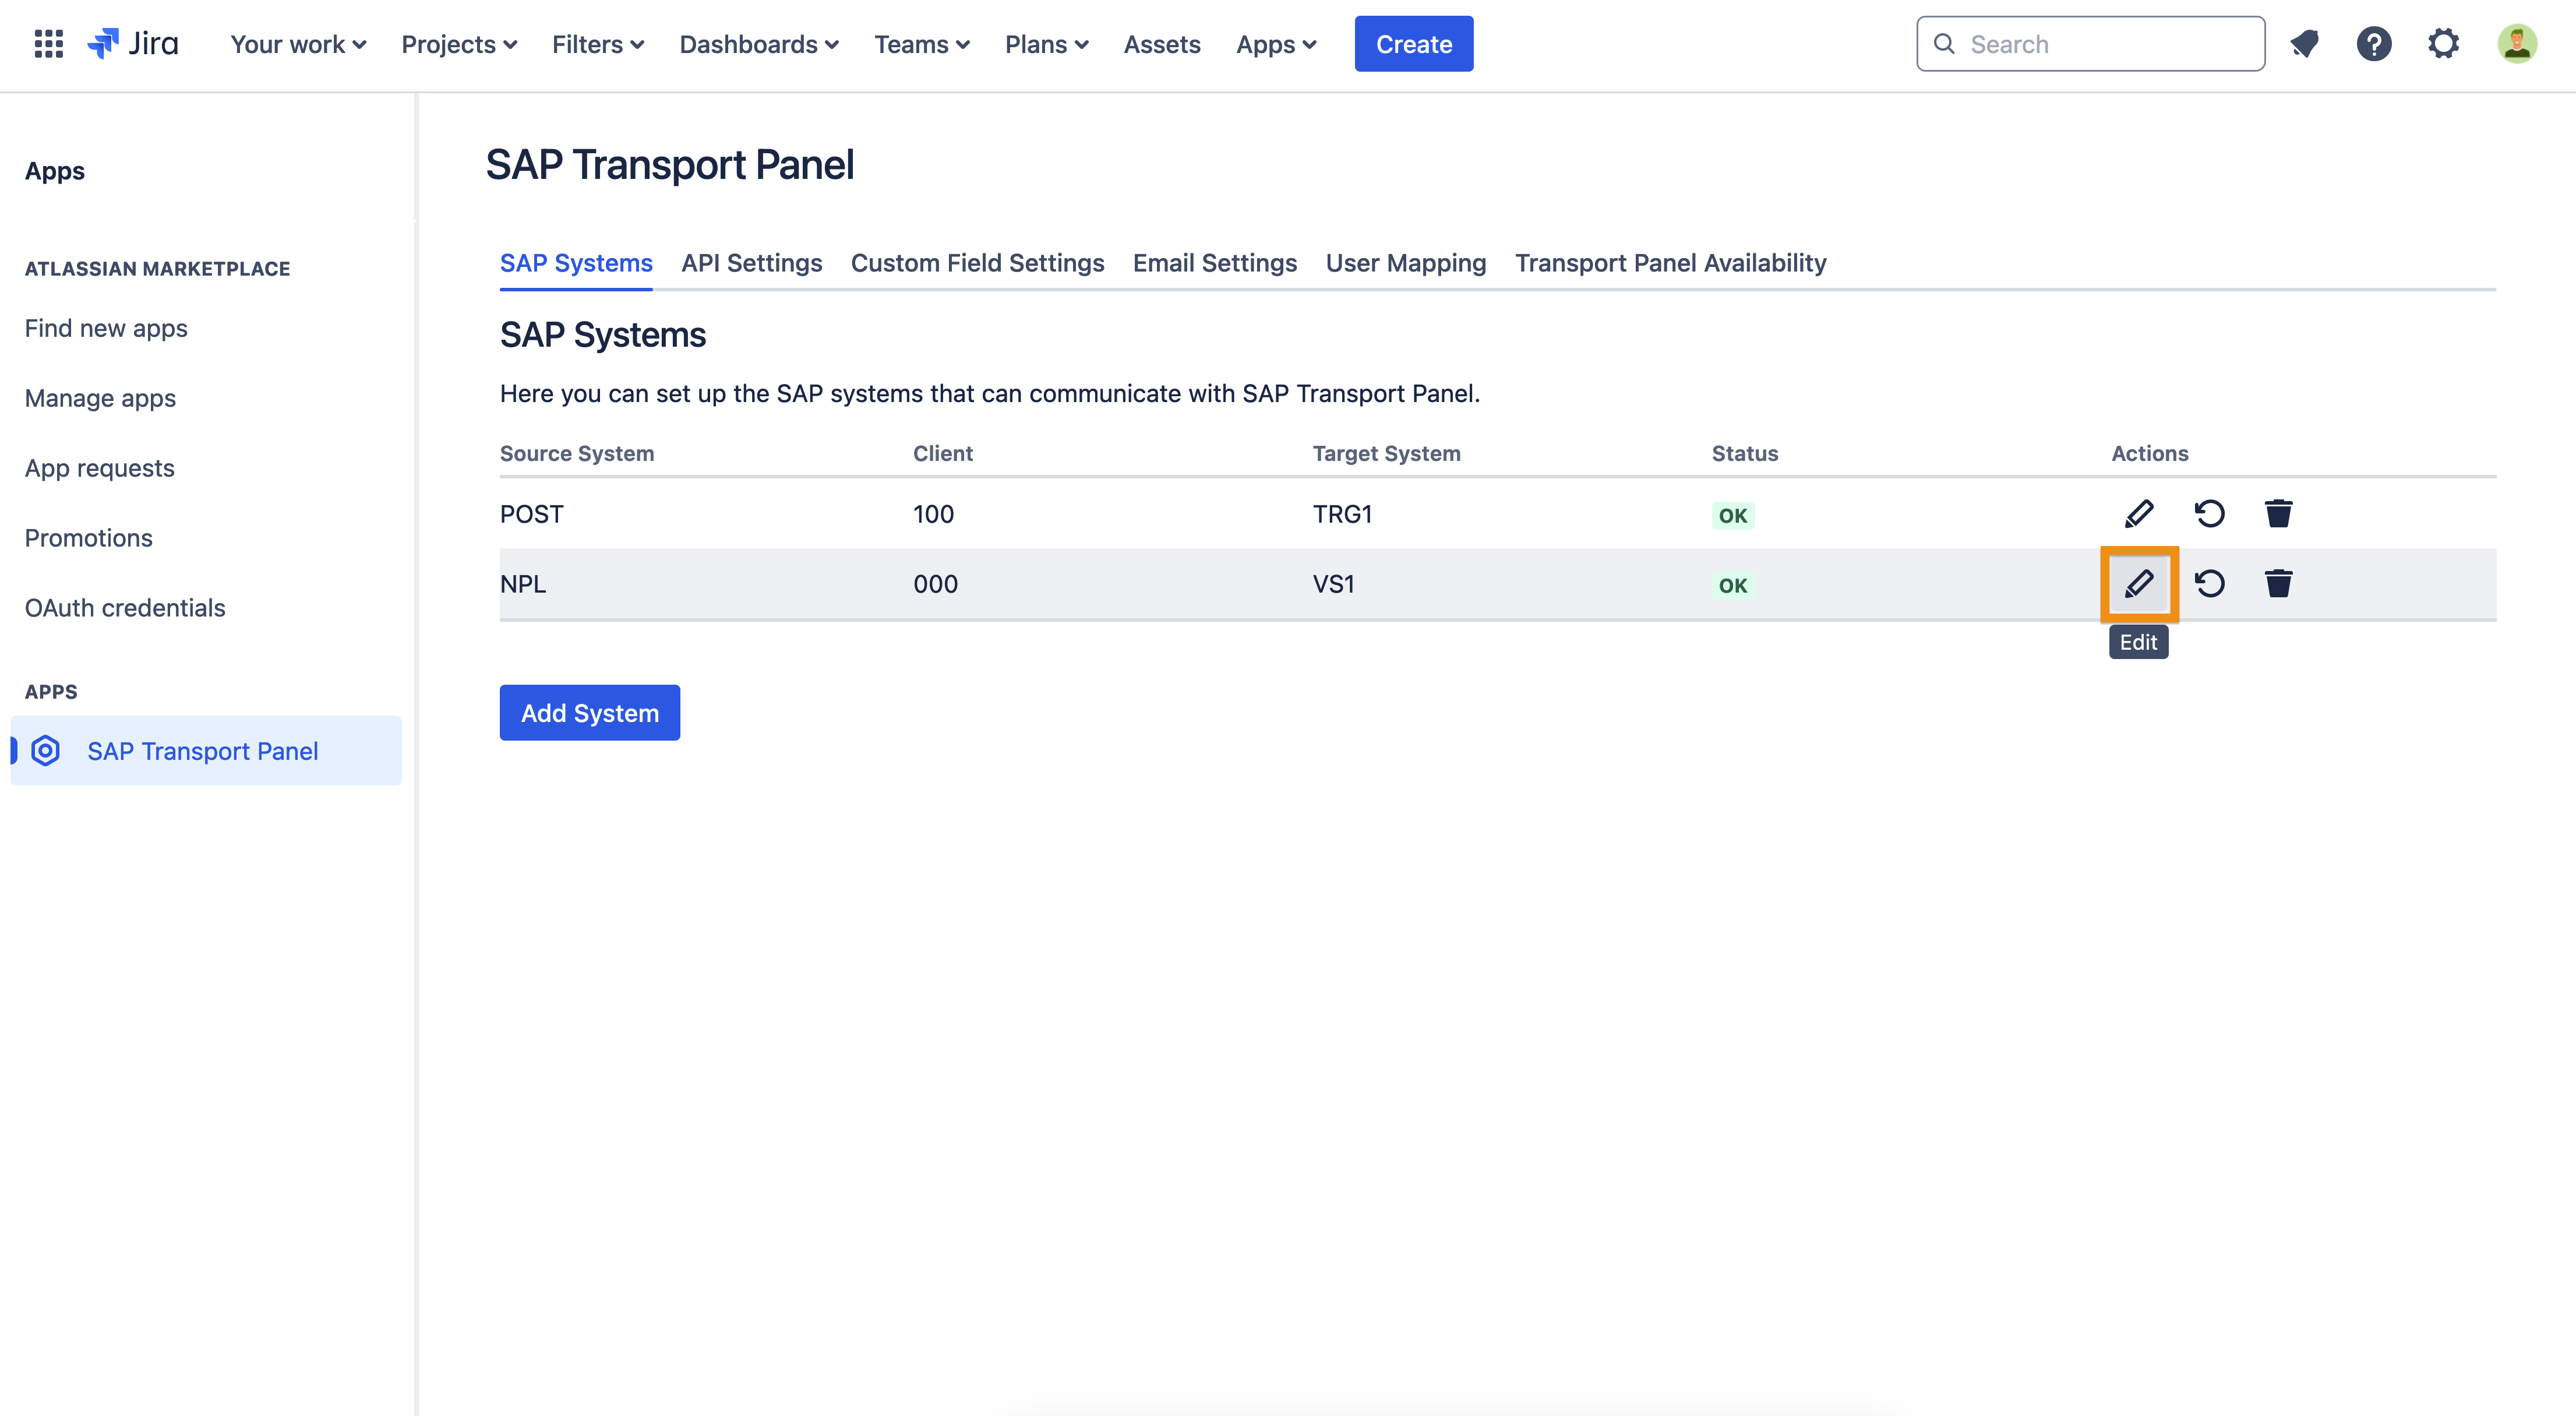
If some adjustments are needed, the system configuration can be edited afterwards.
| Step | Procedure | Example |
|---|---|---|
| 1 | In Jira, navigate to Admin Menu (cog wheel) → Manage apps → SAP Transport Panel → SAP Systems. | |
| 2 | Check the row of the system you want to edit and the column Actions to display the action buttons. Click on the Edit button. |
|
| 3 | Edit fields. |
|
| 4 | Save your setting via click on Save. | |
| 5 | After saving, the configuration will be tested automatically, and the test result will be written in the Status column. |
Testing the configuration
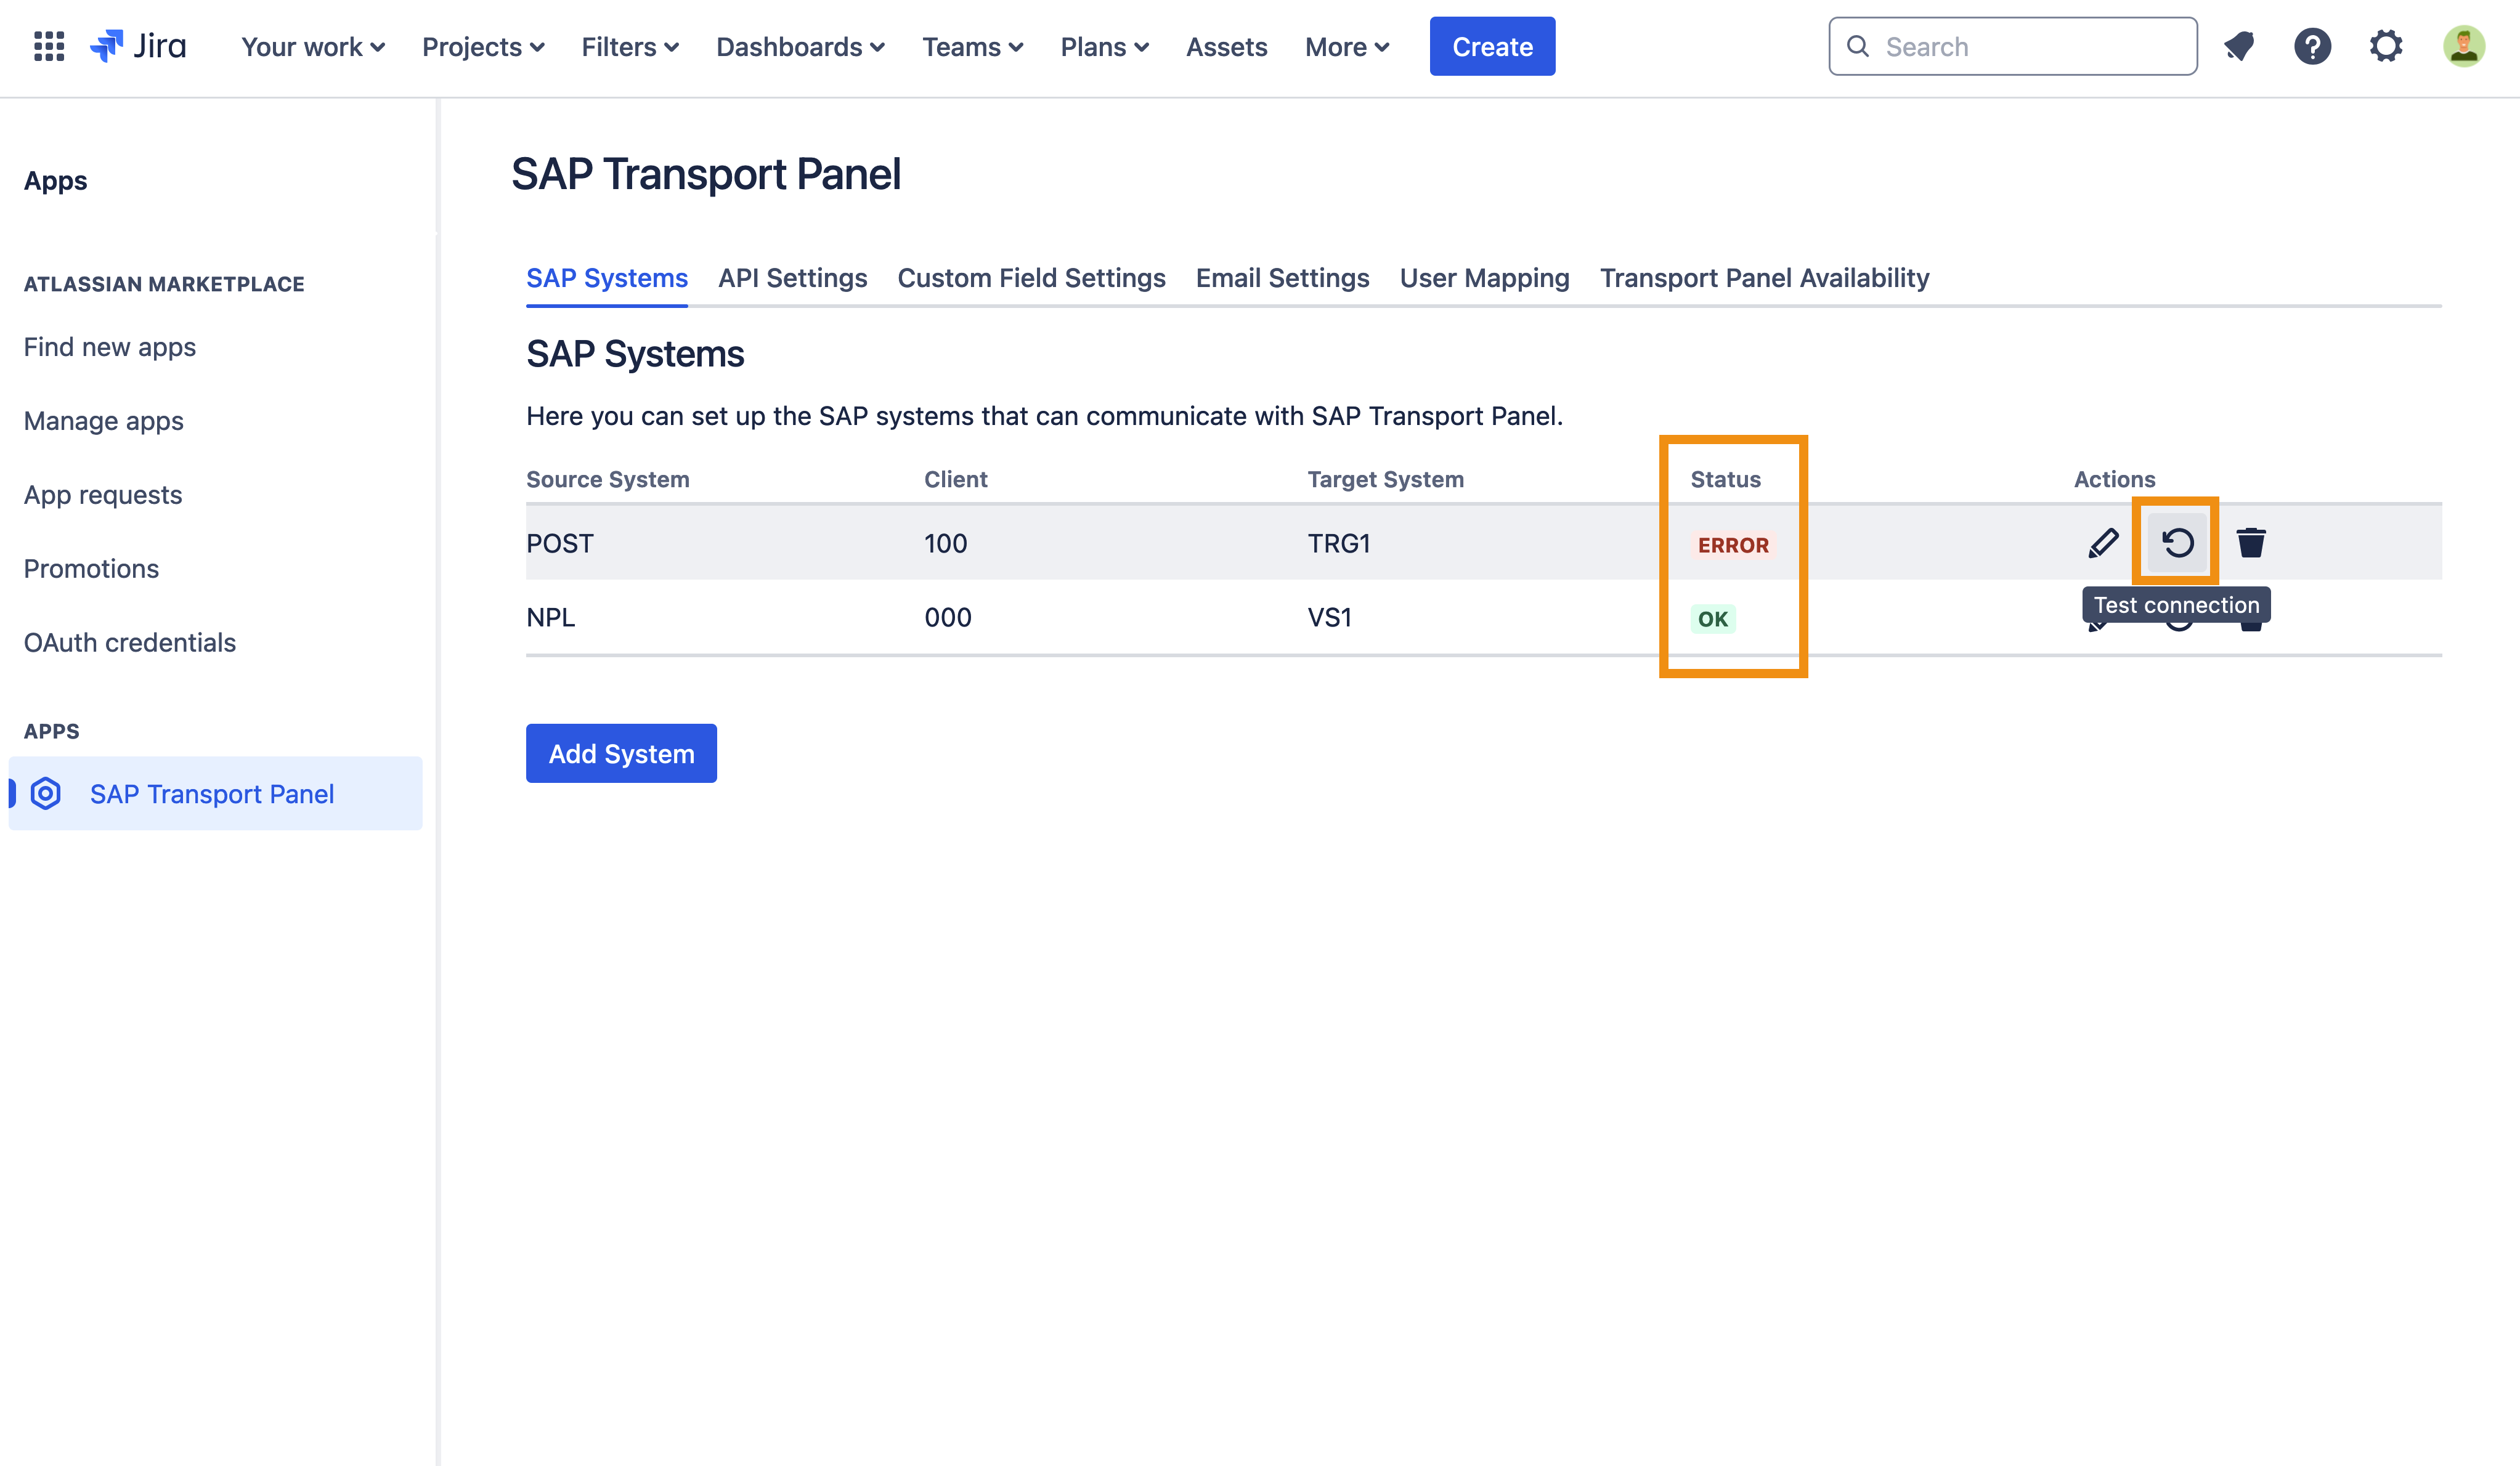
You can test if a system configuration is valid.
| Step | Procedure | Example |
|---|---|---|
1 | In Jira, navigate to Admin Menu (cog wheel) → Manage apps → SAP Transport Panel → SAP Systems. | |
2 | Check the row of the system configuration you want to test and the column Actions to view the action buttons. Click on the Test connection button. | |
3 | The configuration will be tested and after a few seconds the status of the test will be reported in the Status column. You can also hover over the status to see more details about it. |
Delete system configuration
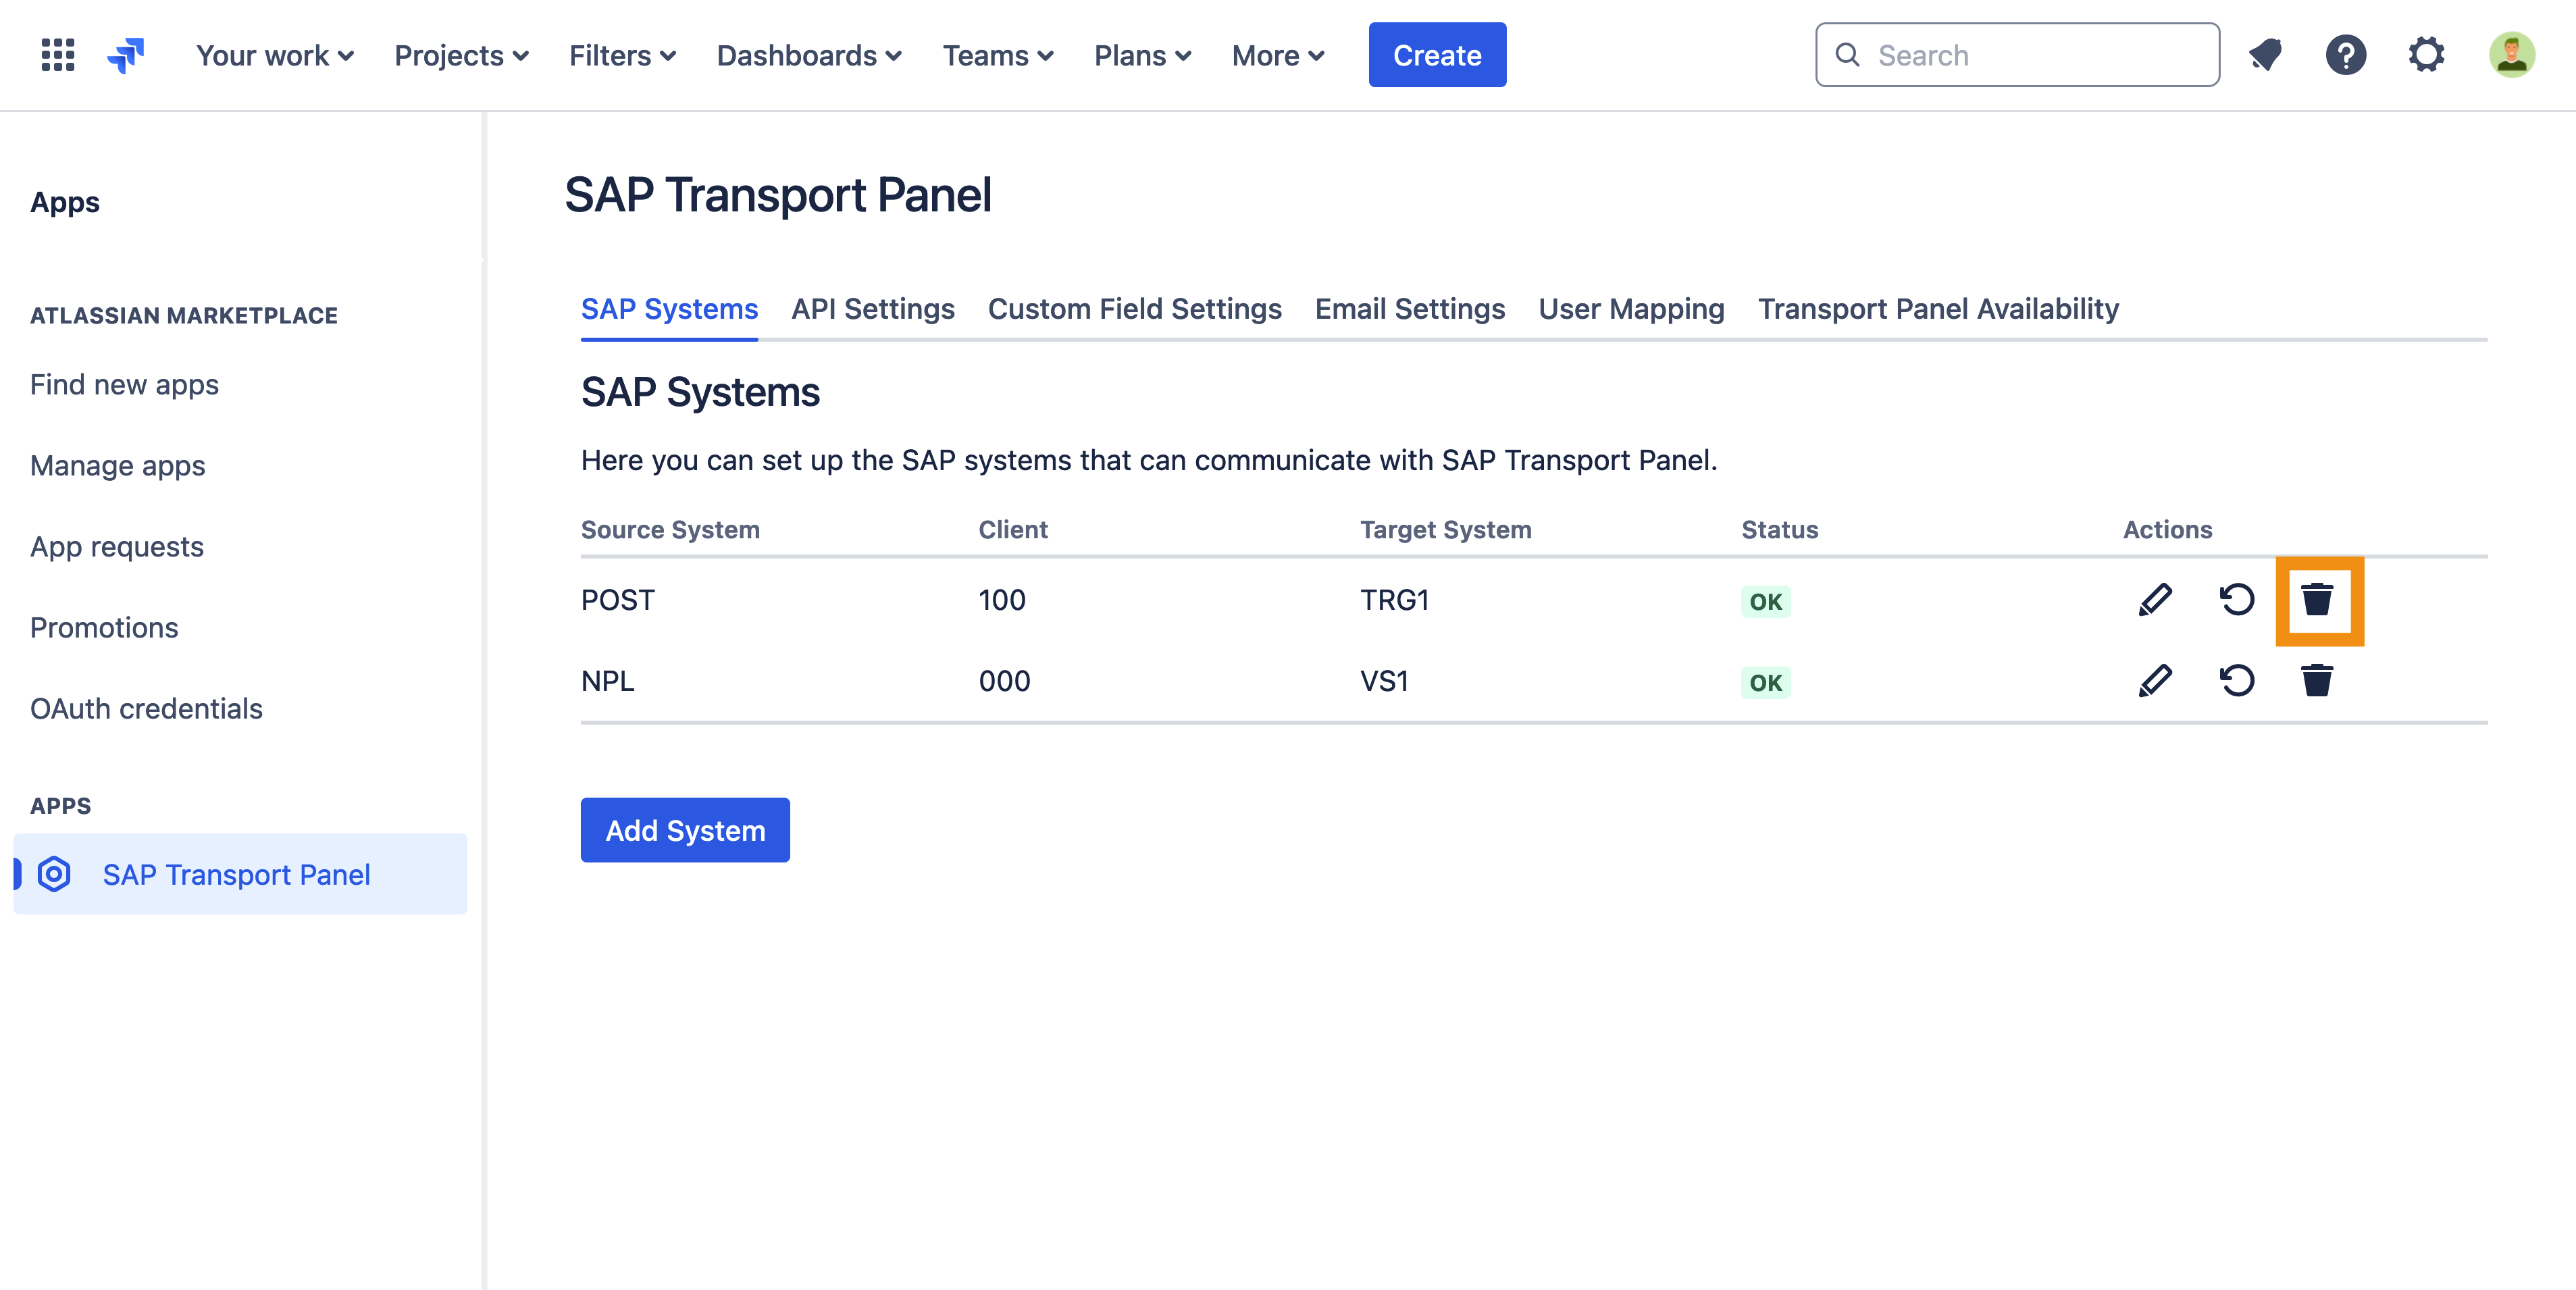
If the system configuration is not needed anymore or was created by mistake it can be deleted. You can also delete all system configurations.
| Step | Procedure | Example |
|---|---|---|
1 | In Jira, navigate to Admin Menu (cog wheel) → Manage apps → SAP Transport Panel → SAP Systems. | |
2 | Check the row of the system configuration you want to delete and the column Actions to display the action buttons. Click on the Delete button. | |
3 | Delete the system configuration via click on Delete. If a system is deleted, then it is removed from the projects to which it is assigned. The projects continue to exist. |
|

