CLOUD Add and delete an existing transport link to an issue and see it's tasks
Add an existing transport link to an issue
If an additional transport request is needed to solve an issue, an existing transport can be linked with your Jira issue.
Step-by-step guide
| Step | Procedure | Example |
|---|---|---|
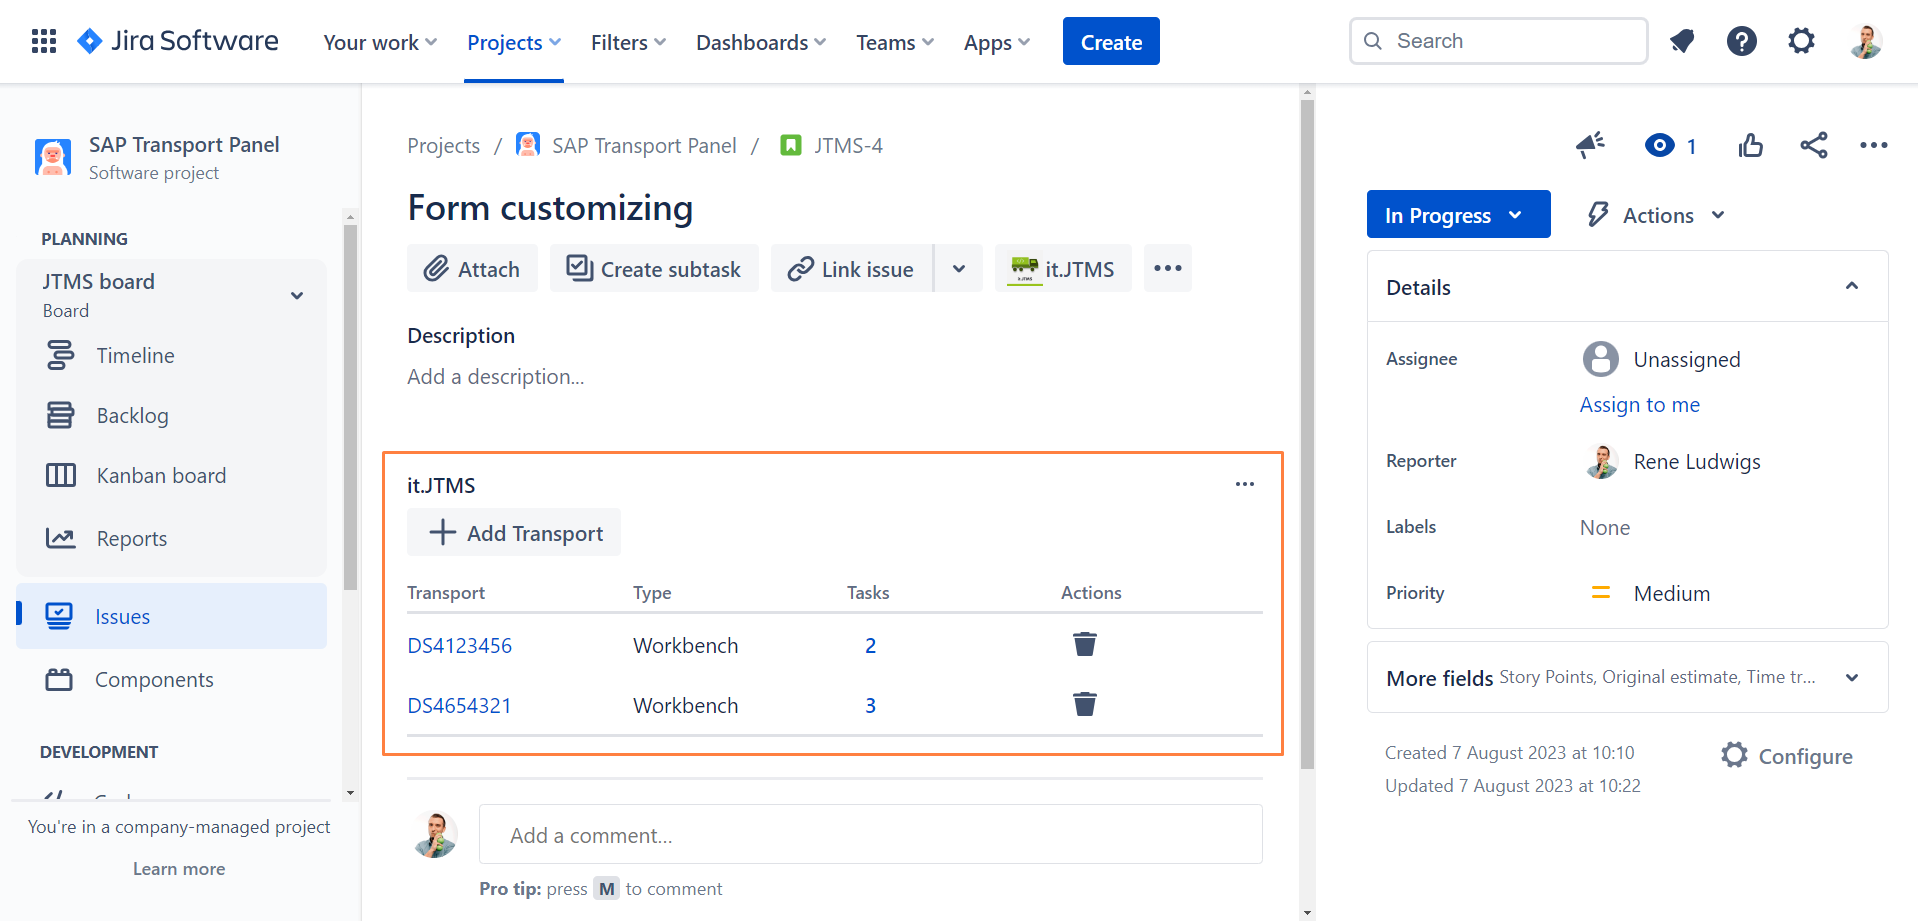
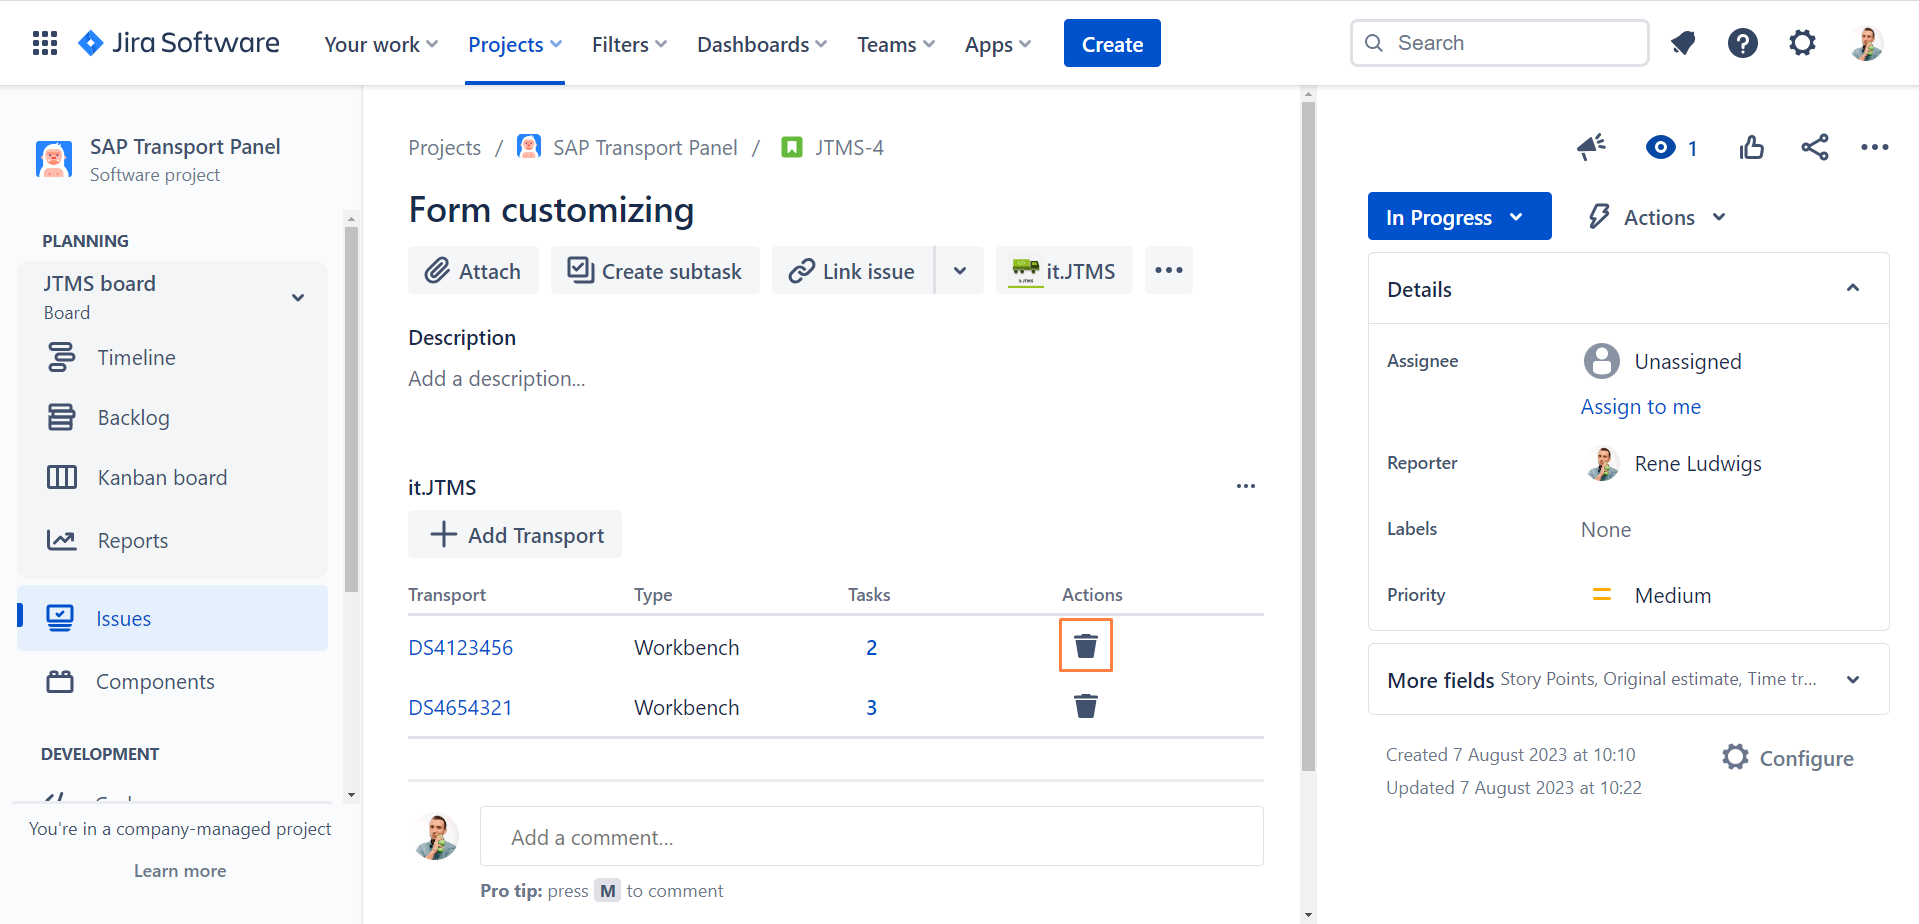
| 1 | In your issue view, find the SAP Transport Panel listing all transports linked to your issue. |
|
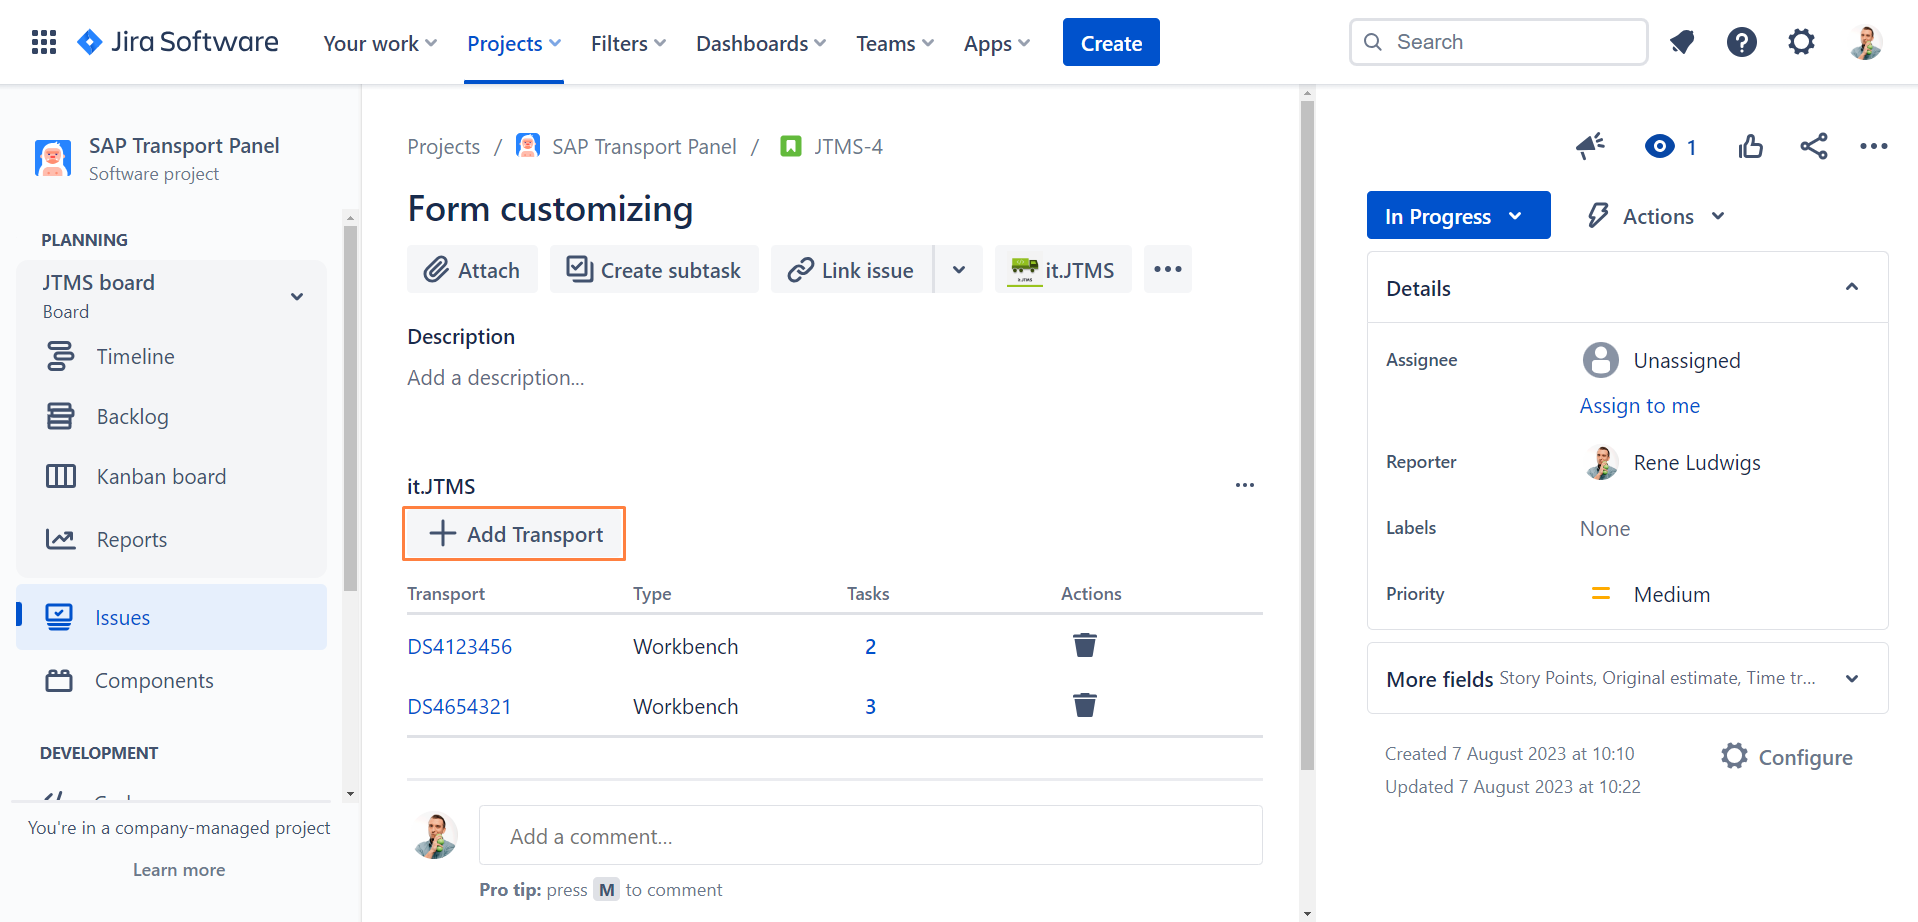
| 2 | Click on the Add Transport icon found in the upper left corner of the panel to open the Add Transport dialog window. |
|
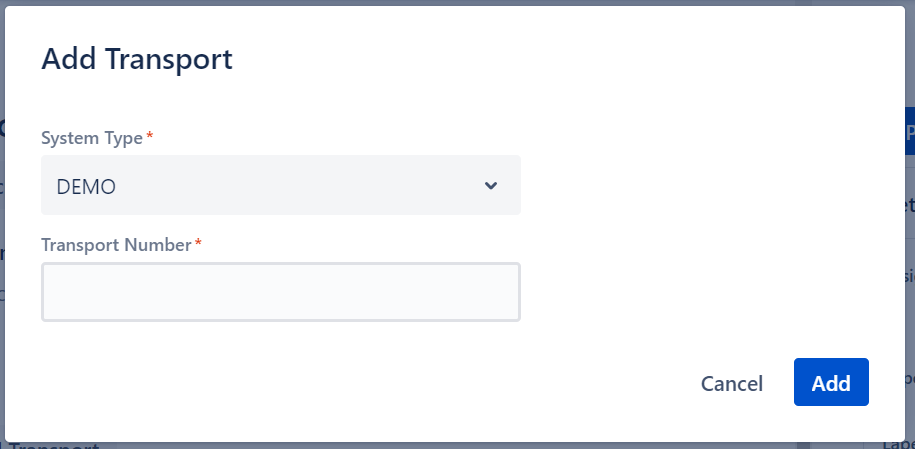
| 3 | Select the relevant SAP System, where the transport is stored. |
|
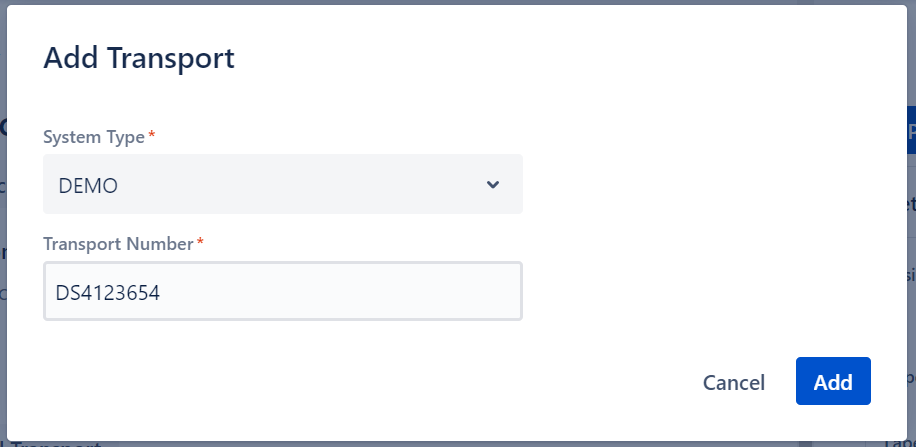
| 4 | Enter the SAP transport number and click on Add. The Cancel button will close the window without any changes to your issue. |
|
| 5 | The transport and issue will now be linked in both Jira and SAP. Only if both links are successfully created will the transport be listed in the web panel.
|
Delete an existing transport link to an issue
The following guide shows you how you can delete a transport link from an issue
Step-by-step guide
| Step | Procedure | Example |
|---|---|---|
| 2 | In your issue view, find the SAP Transport Panel listing all transports linked to your issue. |
|
| 3 | Click on the Delete button that appears on the right side when hovering over the transport link that you wish to delete. |
|
| 4 | The Delete Transport confirmation window will pop up. Click on Delete to remove the transport from your issue. The transport will not be deleted from SAP, only the link to the current issue will be removed in both applications. |
|

